4.29.2011

Jane's Black and White Quilt

For many years now - at least eight - we've been heading down to the beach each year with my best friend and her family. On one of those trips, they also invited some friends that we had never met. We were so nervous - a week in a house with people we didn't know! But, we trusted Ashley and Donnie and their taste in people. Turns out it was the beginning of a new friendship.

Jane and her family are now *my* friends... no longer just friends of friends. We all still go to the beach together, and usually have one or more other excursions with them throughout the year. Both families live in Chapel Hill, and now when we go see one we almost always also see the other. Pretty cool considering you just never know if you'll like your friend's friends. :)

So... (yeah, Jane, that one's for you) fast-forward to last year and my rekindled obsession for quilting. Jane is more contemporary in her tastes, and I was itching to dive into something non-traditional for a quilt. We were talking about her black-and-white bedroom (with a touch of pale blue for accent) and I offered to make a quilt. She's been most patient with me as I've struggled through my other projects and my ADD lifestyle. But finally, I have started on her quilt.

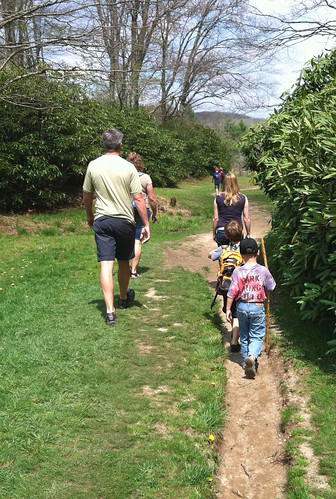
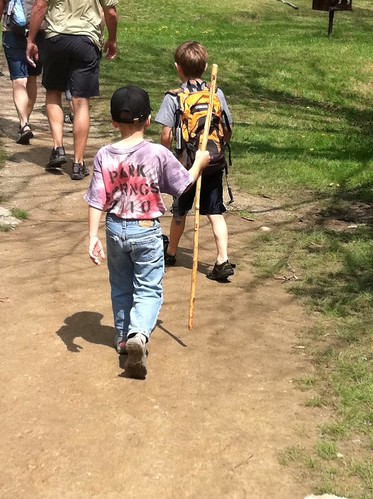
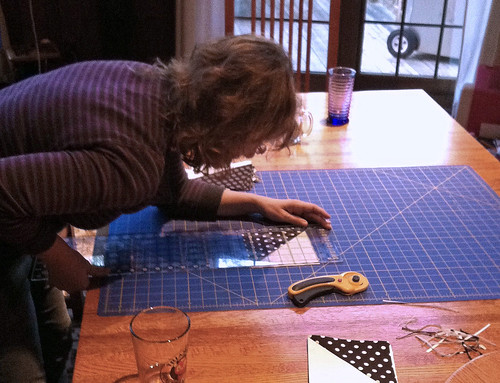
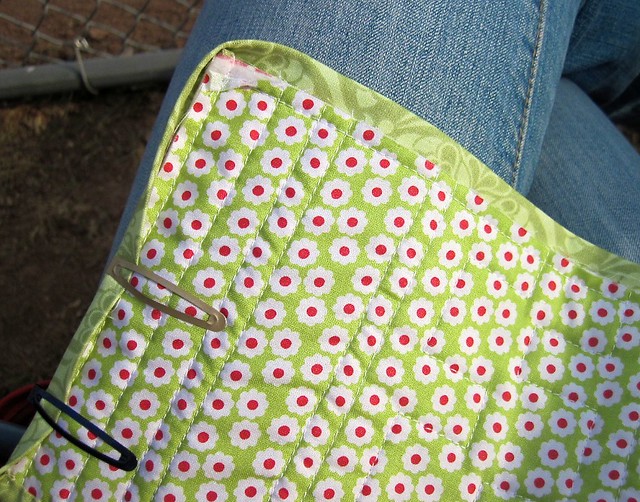
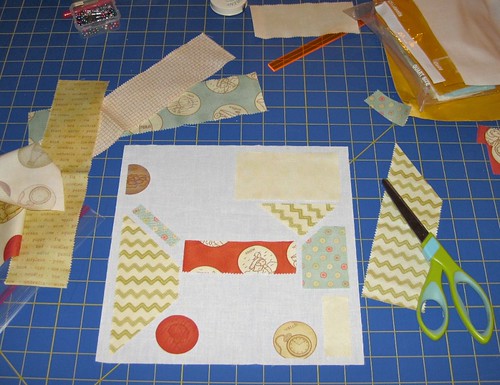
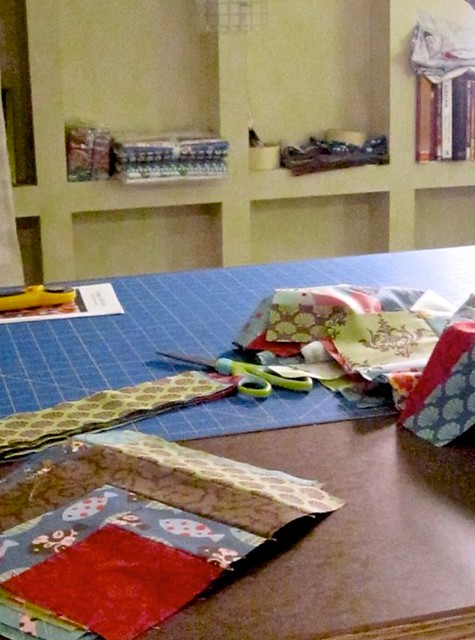
A long Easter Weekend in the mountains was ahead, but Ash had to leave her sewing machine at home despite needing to finish a quilt. Since I had planned on taking my machine anyway, I gathered up some fabric for cutting so I could focus on that and Ash could use my machine.

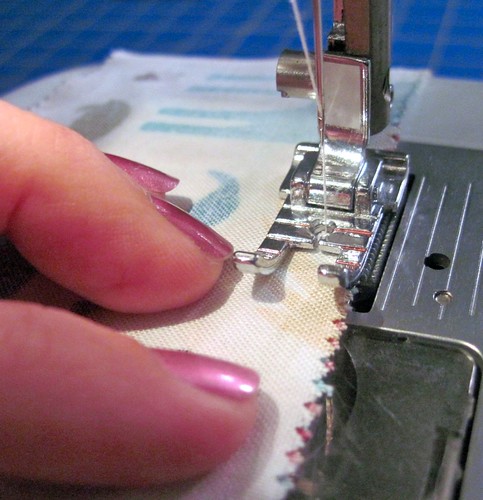
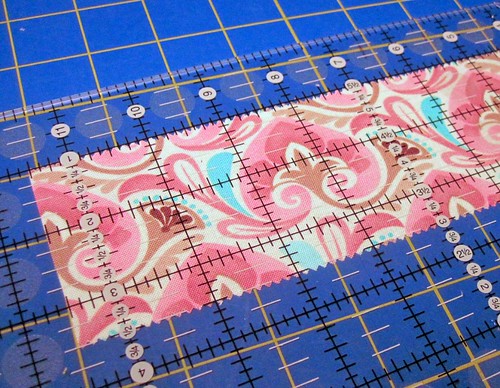
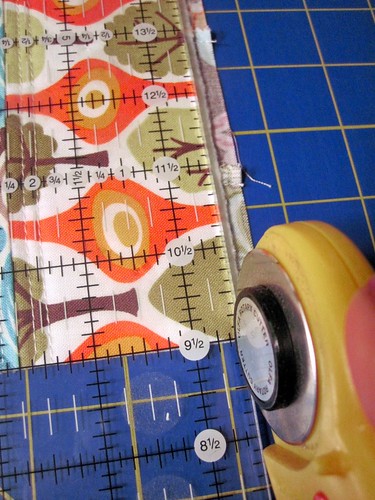
I started out cutting and marking squares for what felt like a bazillion half-square triangles.

IMG_2256_edited-2.JPG


 Sew . . . cut . . . press . . . sew . . . cut . . . press . . . sew . . . cut . . . press . . .

Then a few more bazillion squares for the alternate block.

IMG_2260 copy_edited-1.psd


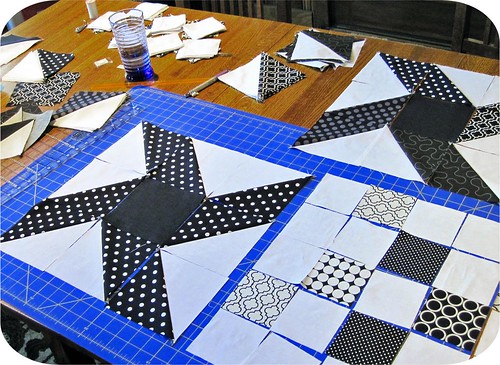
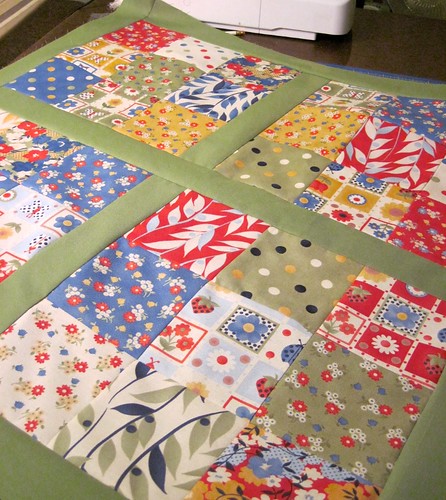
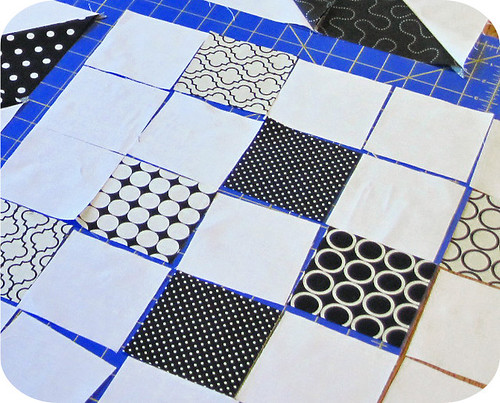
The pattern I am using is Rachel Griffith's Full Swing (free at Fat Quarter Shop, btw!), but in a different color scheme.  

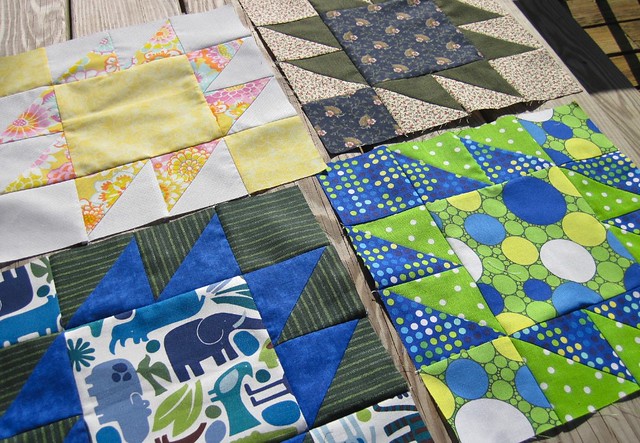
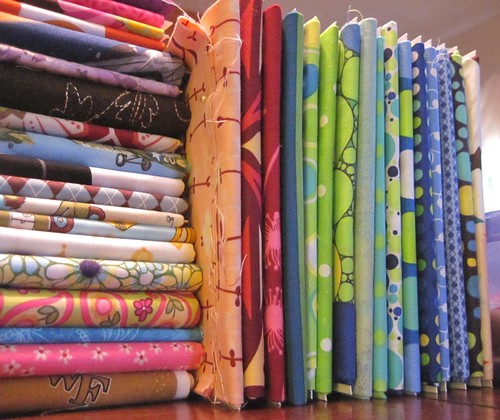
I picked up a half-yard custom bundle of black and white fabrics from Fabricworm and then played around with the combination of prints. As you can see, I was still deciding on the pinwheels in these pics...the upper right is a combination of black fabrics in the arms while the other is all one fabric. (The white is Kona Cotton solid.)

IMG_2259.JPG

The original thought was that each center pinwheel square would be one black print with the "arms" of each a different black print. Five prints total on one block...but it just didn't sit well.

So I tried the black solid in the middle, but it was still a bit distracting (for my tatse) with the arms being different. Final answer?   Black solid in the center and a matching print for all four arms.

IMG_2262_edited-1.JPG

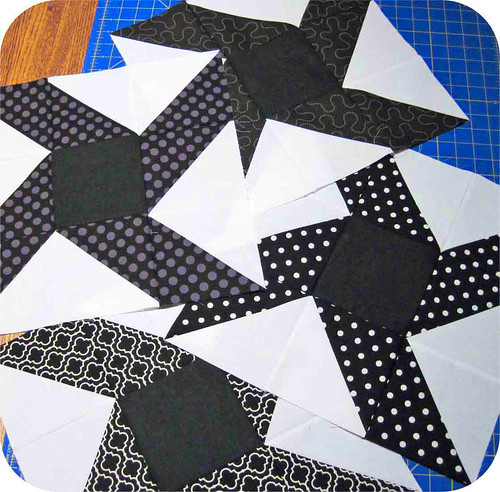
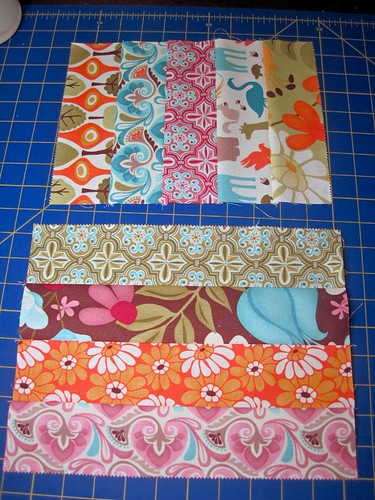
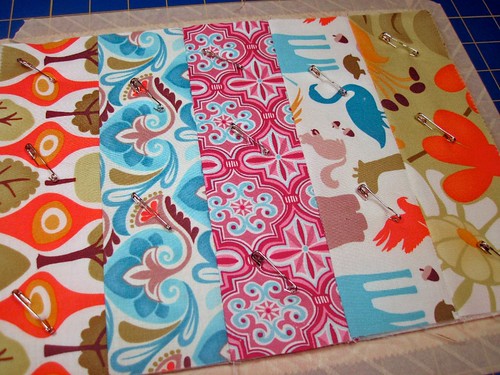
The alternate block is a random pick of four different fabrics that are not used in the pinwheel block, including two white/off-white background prints. I wasn't sure about them at first but I liked them once I laid out the block.

IMG_2260 copy cropped_edited-4.JPG


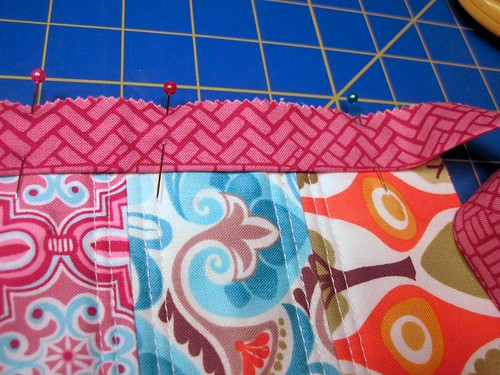
Once I got past the initial cutting, the blocks came together easily and quickly, especially the pinwheels. I still have a few to go and my week has been a bit nuts, so no progress since these pictures. I think I'm going to try a block-a-day approach next week to see if I can pound this thing out.


Wish me luck!

WIP Wednesday at Freshly Pieced


Photobucket

4.28.2011

easter weekend

Like most long weekends, Easter came and went with hardly a blink. It feels like weeks since we took off to spend a few days in the mountains with friends. It was so relaxing and wonderful...I wish I was still there!

As can happen on the Blue Ridge Parkway, the fog was crazy.  There were times you could only see a few feet in front of the car.  Crazy.  To say the least, it took us a bit longer than usual to get there.

IMG_0157_edited-1.jpg

(And, yes, you can see the table runner I'm trying to finish in the reflection.)

The next couple of days, though, were simply awesome.  We got up late, stayed up late, hiked, joked around, ate plenty of food, and practiced a lot of new German words with our new friend, Chris, who is visiting from Germany for a few weeks.  My favorite - Neuschwanstein.  Partially because I'm a princess and partially because it's just fun to say!

Chris even took the time to make cookies with my youngest.  She got a kick out of it - apparently they don't have the break-and-bake cookies in her town.

IMG_0179_edited-1.jpg

We tried a couple of times to head up to Grandfather Mountain, but ended up not going in.  On Saturday the line was just too long.  On Sunday, we.... uh.... well...there were technical difficulties.  You see, they charge to get into the park...which is not a good thing when every adult in the car left her purse at home.  (*cough*).

Plan B for Saturday was hiking a bit on some random trails - they are all over the place up there.  Here, my oldest and I stop for a quick photo.

IMG_2236_edited-1.JPG

Flowers and trees were just starting to bloom, and there were little patches all around.
 
IMG_2241_edited-1.JPG

The trouble, though, is that it really took a toll on our allergies.  I'd been doing very well this spring until this weekend. 

Easter morning was quiet and relaxing - as compared to Easters of the past. This is my first year (other than sicknesses) that I have ever missed church on Easter.   Ever.  It was weird, but at the same time, refreshing.  And very interesting to step away from tradition, even if only for a moment. 

Of course, we did leave a note for that fabulous chocolate-bearing rabbit...and what do you know?! He left us a little treat. :)

IMG_2263_edited-1.JPG

We asked him to go easy on the candy, but as you can see it didn't really work out that way. The LEGOs were a lot of fun, though.

On Monday, we headed out to a local park and took off hiking again.  By this point, though, my allergies had just gotten the better of me.  Shortly after I snapped these photos, I headed back to the car to wait it out.

IMG_0189_edited-1.jpg

The kids were just too cute with their little walking sticks...

IMG_0191.jpg

After I got to the car a storm came up which cleared out the picnic areas. Unfortunately the rest of the group got stuck in it. They were too far out by the time the storm surfaced and couldn't make it back quick enough. (I wish I would have thought to take some pictures of their drenched little butts...LOL!)

All in all, we spent a good portion of time outside, but I also got some quilting done.  Apparently a little too much, as hubby thought he needed to snap a picture of me at work. And now I can see why my back was hurting so much. I really missed my counter-height cutting table.

IMG_0187_edited-1.jpg

That's Jane's Black and White quilt I'm working on, by the way - a post on that soon to follow.

Photobucket

4.20.2011

busy days

This is our first year with both boys in baseball. While I love, love, love it, it can sure make for some hectic weeks. Last night I got some good shots of my youngest at bat.

IMG_2217

IMG_2219

He made it to first base, then slowly around to second and third, but then was left stranded and never made it back to home plate. He's got a good swing and can really nail it when his timing is right. But his running.... well, let's just say we have to work on speeding up his little jog. LOL!

Being a little pressed for time in my Mug-Rug Swap, I took my latest one to the field with me to finish off the binding in between innings and during the slow spots. And given we are watching 6 and 7 year-olds, there were plenty of slow spots!

IMG_2213

Once home, I took some time to catch up on my Spring Quilt Along. Even though I got started a day or two late, I'm still keeping up pretty well with everything. I was able to finish my last 9-patch and add my sashing last night. Not too bad.  Borders will be next, maybe tonight or tomorrow...we'll see.

IMG_2222

All in all it was a fairly productive night. I managed to finish the mug rug and I hope to get it in the mail tomorrow. I had planned on today, but things got a bit crazy...again. Looking forward to a slow, restful weekend.

Happy Easter, everyone!

Photobucket

4.19.2011

Hotlanta!

Let me just start by saying this... I love Atlanta.

I don't know why.  I'm a country girl and I like my long patches of fields, trees, and nothingness. But I've always liked Atlanta. Even as a kid, I can remember saying that if I ever had to live in a big city, it would be Atlanta.

This weekend, I visited there once again...mostly driving through this time as I was actually south of Atlanta in Peachtree City.  I was there for an Operation Christmas Child conference. I am a year-round volunteer for them, but more on that in another post.

While in Atlanta Peachtree City, I was able to do something I've been wanting to do since I was a teenager...can you guess? Here's a hint:

IMG_2165

I was **finally** able to go see a Braves game!

I've been a fan practically my whole life...I mean, who else is there to pull for around here??  LOL!!  But given my strange attraction for Atlanta, it only makes sense that I love their baseball team.  Land of the Free, Home of the Braves, right??  :)


The hotel was only a half-hour away and the game turned out to be so much fun.  We had planned to scalp some tickets, thinking it would be a slow crowd so we could get a good price.  Turns out it was very slow - too slow for scalpers!  As we made our way to the ticket stand, a man approached with two free tickets, asking if we'd like them.  Uh... yeah!   That's right, we got in for free!

Here I am inside...

IMG_2166

The stadium was gorgeous!  And, while I hate that I never saw them in Fulton County Stadium, this place was phenomenal.  So much to see and do...and the history that is peppered throughout!  I think you could spend hours there even without a game going on.

We ended up hopping around the stadium most of the night because the crowd was so thin that the ushers weren't stopping people except at the lower level. Here is the view from where we decided to eat our hot dogs...

IMG_2167


Eventually, we settled on seats near first base, somewhere in the middle of the fifth inning. The view was wonderful and I was surprised at how well we could see. Just a touch of zoom on the camera and I got this...

IMG_2171


Unfortunately, my Bravos lost that night to the Marlins.  But given my oldest son plays for the Marlins in little league, it wasn't too bitter a disappointment.  LOL.

I'll be back in Atlanta in June, but no time for a game on that one-day trip.  We hope to take the boys down later this summer (the Marlin player is actually a huge Braves fan).

Next stadium stop after that??  Taking my youngest to Wrigley.  He played for the Cubs in t-ball and was convinced he played for the *real* Chicago Cubs. 

Once I got home from my trip, we sat around chatting and decided on a cool family goal - seeing at least one game in every major league field.  Granted, it may take us 20 years, but that would be an awesome thing to do.   Anyone want to go with us??  :)


Photobucket

4.15.2011

progress report

Things have been a little nuts here, and I'm heading to Atlanta for the weekend. Not much sewing, but I did get a few things done on my checklist (see it over on the right?) and started on two others. Boy, it feels good to knock off a few things!

I finished basting Matt's coffee quilt earlier this week - Sunday, I think - and it's downstairs ready to quilt.  I had debated about long-arming it, but I think I'm just going to go with a straight-line quilt now.

The accomplishments for the week are my four blocks - two for a local Block of the Month I am in, and two for my church group, the Pinedale Quilters (PDQs).  I used the BOM pattern for this month for all of them, because it's easy that way!  :)

IMG_2151

The blocks on the top are the BOM ones, with the fabrics that the quilt store chose.  I'm not partial to the Civil War type colors, but I'm doing them anyway. The other two are the PDQ blocks... a boy block and one with polka-dots.

I was also able to start a couple of projects. The first is a ticker-tape block for my TwitterB group. I had never even heard of this type of block before...much less tried it. It's slow going, for sure, but I am enjoying the process.

IMG_2159

Finally...and I've been waiting to start this one...the Spring Quilt Along with Above All Fabric. I got started a day late, but still managed to get my sashing and borders cut and arranged one of the nine-patches.

IMG_2162

Now...three days with no machine. Can I make it????

Photobucket

4.10.2011

Are You Ready?!

The quilt along starts tomorrow!! It's going to be so much fun. 

Here is my fabric:

IMG_2087

It's going to be a nice spring-y quilt, meant for hosting lots of picnics and viewing tons of little-league games.  Can't wait to get started.  :)

There's probably still time to jump in if you want, especially if you have a charm pack laying around.   Join us!!


spring quilt along

Photobucket

4.07.2011

my cheesy mac

I'm a terrible mother. 

Well, ok, maybe not...but some days I sure feel that way. 

I had full intentions of coming home tonight and making an incredibly delicious looking Cheeseburger Macaroni recently posted by Amanda. It looks crazy easy. But life happens, and to top it off, I didn't have all the ingredients. So, this is what we ate instead...

IMG_2062

I cooked a pound of ground beef and made two boxes of Trader Joe's Organic White Cheddar Shells. (Um, separately...but you probably figured that.) Once done, I prepped the shells according to the box directions adding the standard butter, milk, and cheese, and drained the beef. I added about half the beef to the prepped shells, tossed in a pinch or so of garlic powder, onion powder and seasoned salt and...Voila!. My cheesy mac. 

Not counting the time it took to heat the water, I'd say I spent a grand total of 15 minutes on it. 

No running to the store, no spending even more money this week at a restaurant. (And a cooked half-pound of beef to freeze for future spaghetti!). Not fancy or gourmet...just necessary. 

Perfect for the days you have to get up at 4:40 a.m. to take your hubby to the airport (90 minutes away) for an unplanned trip, drive back, and work a full day in the office so all you want to do at dinner is collapse. 

Yeah...that kinda day.  

But my kids are laughing on the sofa, we're all in our PJs, and one of our favorite movies is playing. 

Maybe I'm not such a terrible mother after all.  :-)

Photobucket

4.04.2011

my newest "project"

My fabric stash has exploded. And I mean that in all definitions. Thanks to a quilt bee, several completed projects, and a scrap bag or two, I have more fabrics on hand than ever before. But, they are also all over the place. Sorta looks like a bomb went off.

When I got my first TwitterB block fabric, I actually was looking for scraps in three different places in my house. Not good. Great big (like 20-gallon big) containers of batting, scraps, kits, books, you name it. Then another pile downstairs and still more in small containers. At least the small containers were partially organized.

To say the least, it was a bit frustrating.  Especially given that I kept finding things I had forgotten that I had purchased - like five additional table runner kits from Fat Quarter Shop.  *sigh*

A little after discovering admitting to this problem, I found this fabric folding tutorial over at Cut to Pieces.  - - - "Liiiiiightbulb."


(We are huge Despicable Me fans, btw.)

I've posted on my sewing  space before, and I know this isn't the best picture - still terrible light down there - but check out the background.  See those "cuts" in the wall?  Perfect stash shelves.  :)

IMG_1631 - Version 3

So, last Thursday on a return trip from Charlotte, I stopped by the local comic book store and picked up a pack of 100 backer-boards.  When I got home that night, I started gathering my stash pockets bit by bit and after a little time, I had this....

IMG_2053

It's going to look so good on my wall!!  Oh, I can't wait.

The horizontal fabrics are about 1/2 yard or larger (but I don't really measure - just eyeball) and the vertical ones are 1/4 yards to 1/2 yards.  I cut the boards in half for them.  I haven't worked on any of my fat quarters yet, so I'm not sure how they will work.

I'm about a third of the way done, and I can't wait to see how they turn out!   It's also been fun to discover what I have in my stash as I've come across several that I just don't remember buying... a print from the Pure line, one from Modern Meadow, several from All Star, etc.  Maybe I'll find my brain while digging out the rest of my fabrics, LOL!

Photobucket

4.01.2011

Reversible Mug Rug Tutorial

One of my favorite things about the quilt-blogging community is the sense of generosity and helpfulness that seems to overflow at each website. When I first started my quilting journey, one of the ladies in the local sewing shop told me "a good quilter is always happy to get someone else addicted to her hobby," and, boy, was she right. And it's even more true of the online community.

So in the spirit of giving back (and goodness knows I owe plenty considering all the freebies I've downloaded), I present to you my very first tutorial. It's on my Central Park mug rug, which I adore. This is the first mug rug I made as part of Two More Seconds "Mug Rug Madness". The original inspiration was from the tutorial by A Cup and A Catchup, which is where I got the idea for the stripes and adding wording.

It was simple and fun - and I hope this will inspire you to make one, too.


Central Park Java Mug Rug

IMG_2017


Supplies: Jelly Roll or other 2.5-inch strips (leftovers/scraps will work fine), one full jelly roll strip (2.5 inches by 42 inches), 9" x 12" piece of batting, contrasting fabric for letters, iron-on fusing.

Directions: To begin with, audition your strips and decide which ones you like. Choose five for the front and four for the back.

auditions, anyone?

Cut the five strips for the front to 8-1/2 inches by 2-1/2 inches.

strips for the back


Sew together and press. (After pressing to one side, I went back and re-pressed my seams open. This seemed to help the top lay more flat, which is good since I'll be using this for glasses/mugs.) Remember to use a 1/4-inch seam...and a scant 1/4-inch is even better.

stitching away


Cut the four strips for the back to 11.5 inches by 2.5 inches.


trimming the back strips

Sew together and press.

You should now have two sets of strips, a top with five vertical strips and a back with four horizontal strips. Square up the front and the back, leaving the back a bit larger.

front and back


Place the back (horizontal strips) right side down on your cutting mat and tape down. Arrange batting on top. I like to line up at least one edge here to prevent excessive waste. Place the front (vertical strips) right side up on top of batting. Pin, if you wish.

basting


Quilt however you choose. I decided to echo the seams with straight-line stitching. This gave a nice perpendicular stitch to the horizontal strips on the back. Once quilted, trim up your edges so you will have a straight line for your binding.

trimming back


Binding:
For the binding, I cut my full jelly roll strip down to a width of 1-3/4 inches. I like this width because it seems to take up less space on the mug rug and isn't so overbearing. If you aren't comfortable with this, you can certainly choose a larger width. I like it because it seems more proportional to the size of the finished project. Regardless of the width you choose, fold and press in half down the entire strip. Then attach to the mug rug, raw edge to raw edge. (For binding basics, I highly suggest Julie's tutorials at Jaybird quilts. Absolutely fabulous.)

pinning the binding

When stitching on the 1-3/4 inch binding, I also shifted my needle two places to the right of center. If you do this, be sure to manually check that your needle will not hit your sewing foot. Not checking first could break your needle and send shrapnel flying. This is bad.

Again, for corners and finishing off, see Julie's binding tutorials and/or bind in the way you would normally bind a quilt. I hand-stitch mine to the back, but machine stitching will work, too.

For the letters:
Choose the letters/word you want to fuse to the mug rug. Some ideas are "java", "latte", "tea", "snack time", or even monogramed initials. Whatever you want is what you should use!

Pick a pretty font, type your letters/word in a word processor (MSWord, Pages, etc.). Once you are happy with the appearance, increase to a good font size, and print it out. If you need font ideas, check out all the free fonts over at Fonts for Peas. The font I used is Pea Alexis.

Take the paper and cut enough fusible web to cover the letter/word area. Trace the letters with a pencil BACKWARD onto the smooth side of the fusible web.

tracing backwards

Iron the fusible web to a similar sized piece of fabric and carefully cut out the letters.

IMG_2014

IMG_2015


Peel the paper off of the letters and place them on the front of your mug rug. Press into place (don't iron, as it could move the letters). If you want, you can stitch these down by hand. I didn't, but I'm keeping an eye on my edges. If they start to lift, I'll likely go back and do this.

Now, stand back and admire your brand new mug rug! Front. . .

IMG_2017

. . . and Back!

IMG_2020


If you end up making a mug rug based on this tutorial, I'd love to know about it! Feel free to leave a link in the comments below.

Enjoy!!


Photobucket