Showing posts with label charity quilts. Show all posts

6.17.2011

Brick block tutorial - featuring Daisy Janie

A while back, Jan at Daisy Janie Organic Fabrics posted an idea for a Project Linus quilt.  In a nutshell, she was looking for quilters to help by making blocks for a quilt.  She would send out charm squares to anyone interested, we would make the block, send it back, and she would assemble the quilt.  I've been wanting to try her fabrics for a while, and I love the idea behind Project Linus, so I jumped right in.

The instructions were simple... make a block.

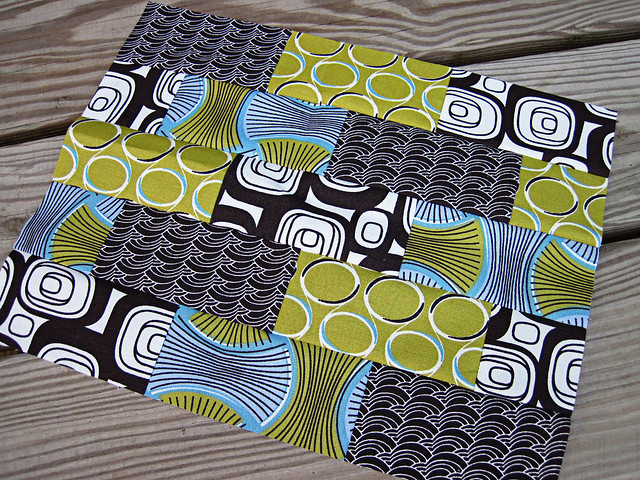
No specific pattern, no size limitations, etc.  Just make a block using the fabric she sent.  I played around a bit in my mind and ended up with this:

IMG_2885_edited-1.JPG


And here's a tutorial for it!

One small note... this is a rectangular block.  Finished size is approximately 10.5" x 14.5".  However, if you wanted to make it a square, it would be easy enough to alter.  I wanted to use as much of the material as possible, thus the rectangle shape.

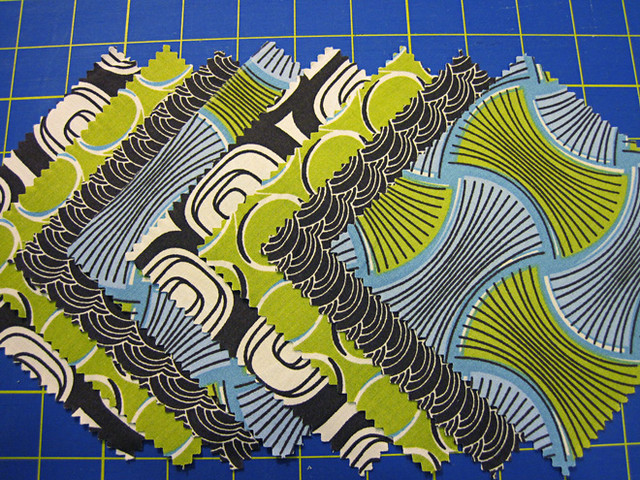
To start, choose eight 5" (charm) squares.
IMG_2864.jpg

Featured here are (left to right) Hip Squares, Crystal Ball, Caravan, and Bundles from Daisy Janie's Geo Grand collection.

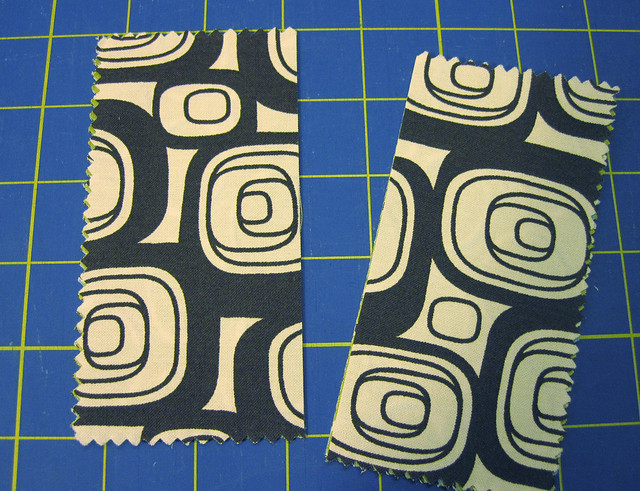
Cut each square in half to make a total of sixteen 2.5" x 5" strips.
IMG_2865.JPG

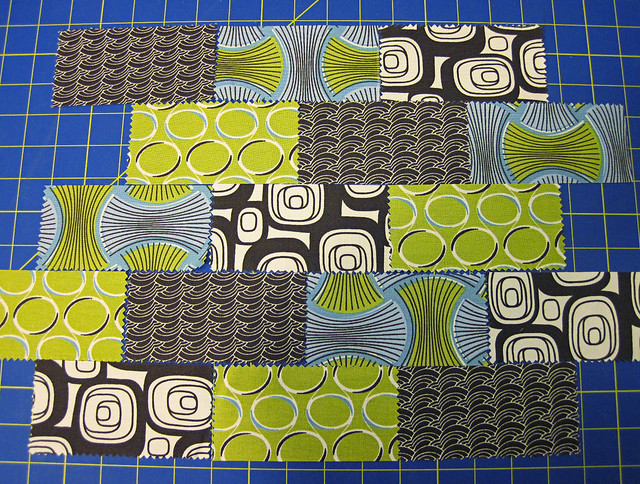
Once cut, lay out your strips in such a way that they look like bricks stacked on top of each other. I chose to lay mine out in a stairstep fashion, alternating the green and blue with the browns.
IMG_2869.JPG

As you can see, some strips will hang off the sides. For one of them, you will need to cut a strip in half to fill in the hole on the second row (see below).  I cut the brown (bottom right) to fill in the hole (top left) so that the pattern continued.
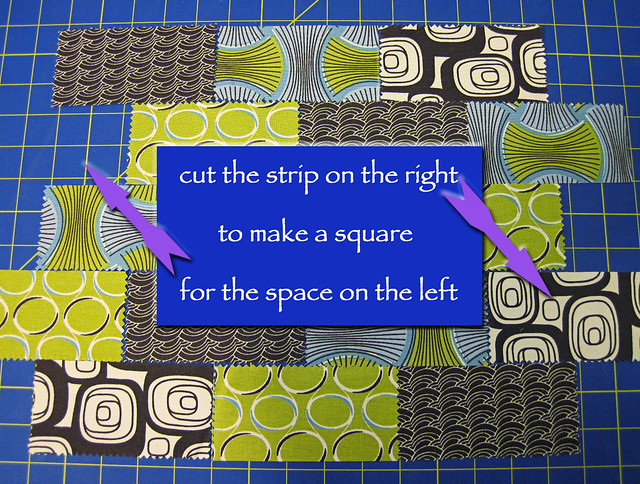
IMG_2869_edited-2.JPG

For the other danglers, you have two options on cutting.

Option 1: cut them into 2.5" squares like so...
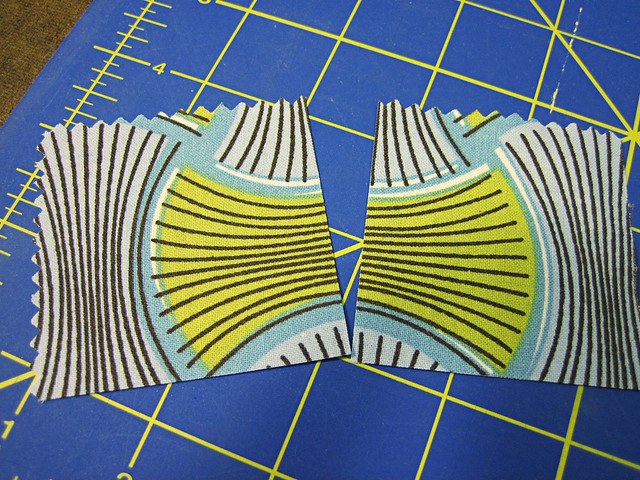
IMG_2872.JPG

...and attach them when sewing.

Option 2: leave them as-is and attach, trimming at the end.

I chose both - I chose to cut the Bundles (green/blue) strip and leave Crystal Ball (green circles) strip so you could see each.

Now, using that infamous scant 1/4-inch seam, sew your strips together to create five rows.
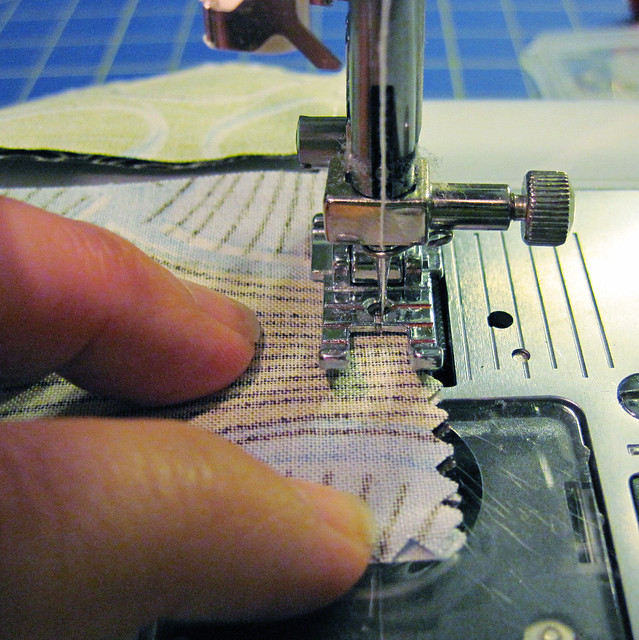
IMG_2873.JPG

You should end up with something like this (remember, the green is the dangler I left in):
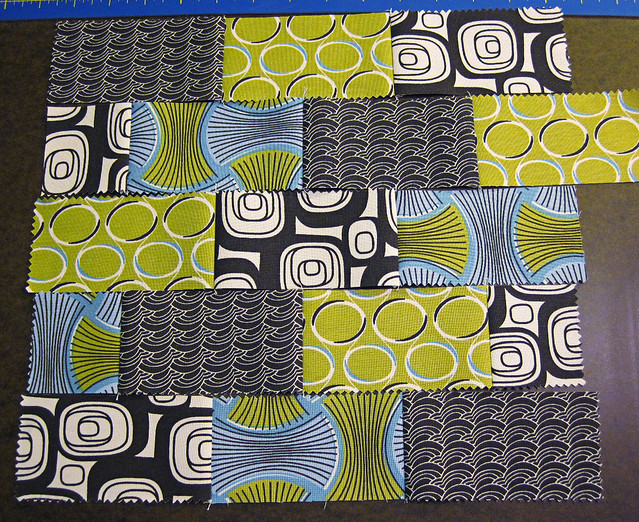
IMG_2874.JPG

Don't panic if the rows aren't the exact same length. Some have more seams than others, which cuts down on the row length. For instance, in the photo above, you can see that the fourth row down is shorter than the row above and below it. That's OK.

Now, because the rows are uneven, we aren't going to line them up at the edges to sew them together. Instead, center the rows by folding the top one in the center, finger-pressing (no iron needed), and matching the crease to the seam below it in the second row.

Clear as mud?  OK step by step...

Take Row 1 (at the top) and fold it in half.
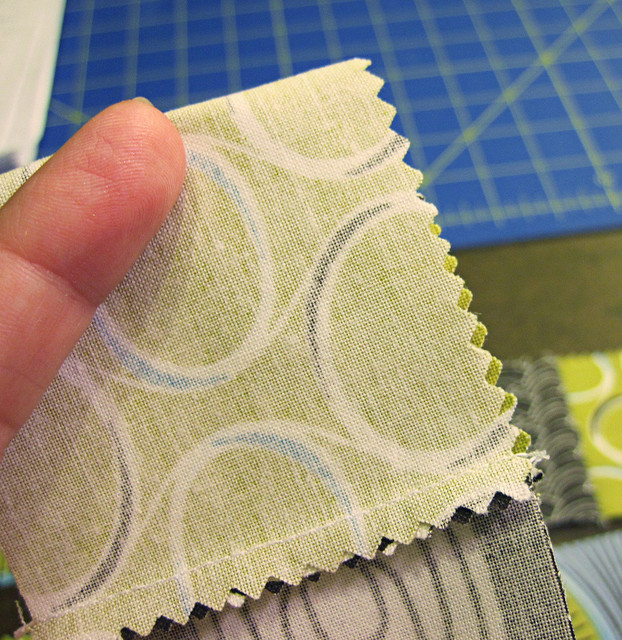
IMG_2876.JPG

Finger press to make a slight crease.
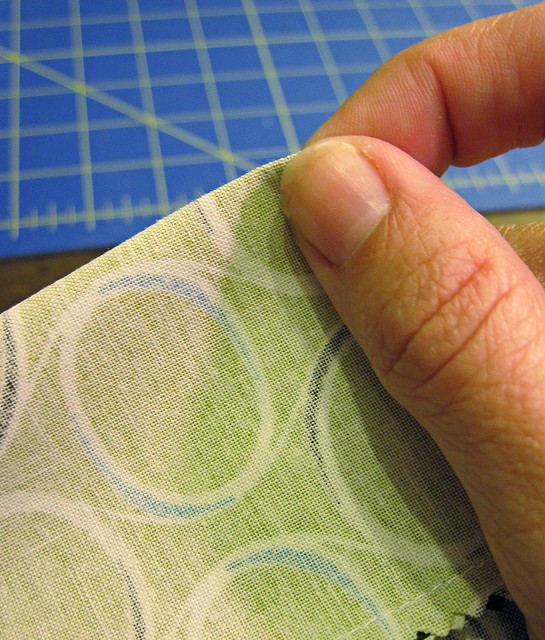
IMG_2875.JPG

Pin to Row 2 (right sides together) so that the middle seam of Row 2 matches up with the crease you just created in Row 1.
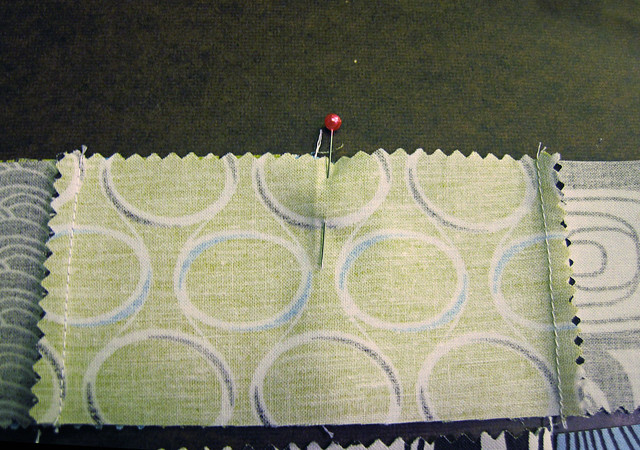
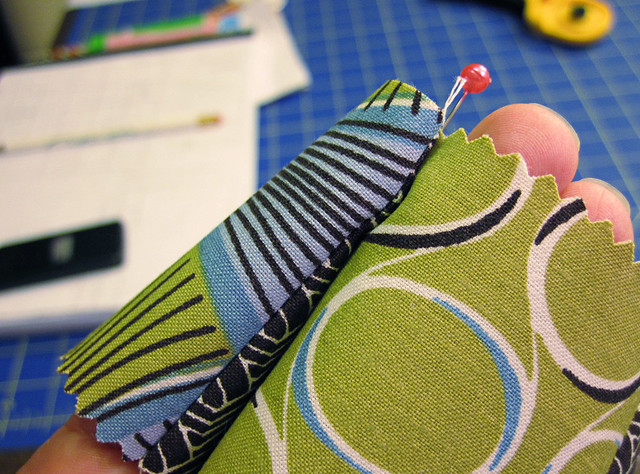
IMG_2877.JPG

IMG_2878.JPG

Sew Rows 1 and 2 together, using a scant 1/4" seam.
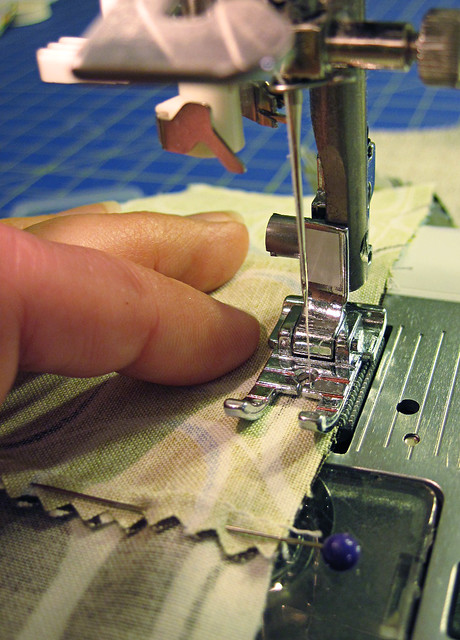
IMG_2880.JPG

Continue the same process by finding the center and sewing each row together, folding to create a crease and matching it to the center seam in the adjacent row.

Once you have all rows sewn, trim your block, cutting only the minimum necessary to make a straight edge on all sides.
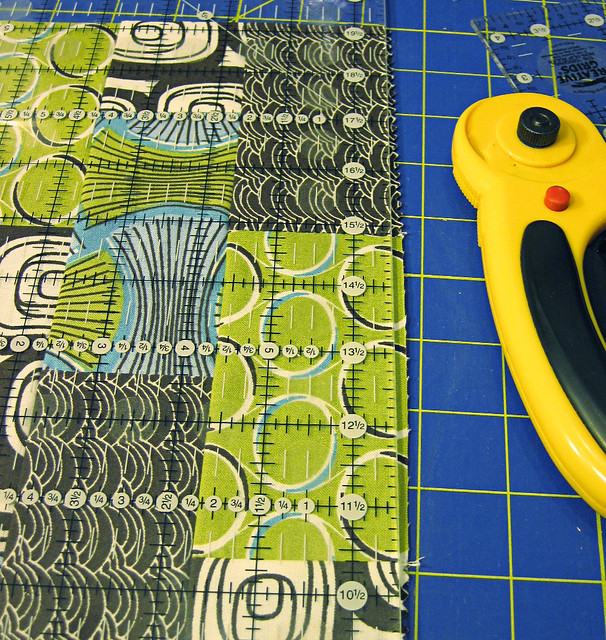
IMG_2881.JPG

When you're all done, your block should look like this:
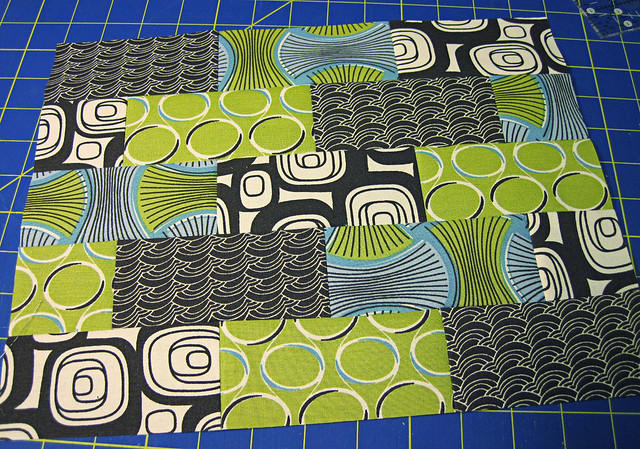
IMG_2882.JPG

...and your leftover scrap pile like this:
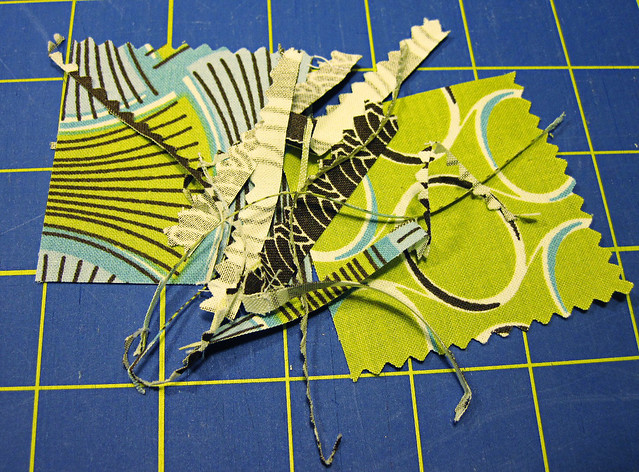
IMG_2884_edited-1.jpg

I know, not much for building a stash, but pretty awesome for trying to use all your fabric!!


Now, if you were wanting to make a square you could either adjust the original layout (before sewing) and cut more strips into squares to fill holes. Alternatively, you could trim to a 10.5" square in the final step and have more for your scrap bin. Either way would work just fine.

I hope you enjoy this block! Be sure to keep an eye on the Daisy Janie blog for pictures of the quilt. I can't wait to see how it turns out.

Oh, and if you make a block using this tutorial, please add it to the Stitching by Starlight flickr group.  I'd love to see it!!

{Sew} Modern Monday at Canoe Ridge Creations
UndertheTableandDreaming


Photobucket

5.25.2010

Quilts for Kids

OK - so last week sometime, I said I would post pics tomorrow.... well, this is tomorrow in "Angie time"...LOL!!

My latest project has been two quilts that I finished for "Quilts for Kids" - a group that is giving hand-made quilts to kids who are hospitalized with chronic diseases.  When we first received the package of quilts for our group, I tried to pick out a girl-friendly theme since I'm pretty much stuck with boy quilts at this point.  Alas, however, there were no pinks and princesses to be found.  So, the first one I picked was as gender neutral as possible... bugs!  Now, before you go "ewwww,"  these are friendly, cute little bugs.  And the colors were nice and bright.  There are even a couple of ladybugs.  :)  The other kit I picked was airplanes...a natural for me.  Tanner loves airplanes, so I finished this one in his honor. 

The kits came with pre-cut fabric and backing, so all we had to supply was the batting (the cotton in-between the layers) and the thread.  Oh, and the time...LOL!  The fabric was sent in pre-cut strips, which made the blocks super quick to cut out and piece together.

I finished the bugs quilt first.  It was a cute blue and green jungle-print four patch block alternating with a solid yellow bugs block.  The inner border was green and the outer border was the same bug print, but with a black background.  I have to admit I wasn't crazy about the black, but c'est la vie!

The actual quilting was pretty easy, though tedious.  It was just a straight stitch on the bias going from corner-to-corner on each of the squares.  The kit instructions specifically asked for a lot of quilting, so I stitched the lines at a little less than two inches apart.  (The extra quilting was requested so that the quilts would stand up to frequent hospital washings.)

The backing for the bugs quilt (which I named "Bed Bugs") was a pale yellow batik and we were instructed to bind the quilt using the backing (more on that in a minute).

The second quilt kit I picked out featured bright, primary colors and airplanes.  We ended up naming this one "Just a Plane Quilt".  The colors for this one - a red and yellow four-patch and a blue background fabric with multicolored airplanes - seemed to flow a bit better than the bug quilt.  Like the other, it was easy to cut, piece, and sew and I used the same quilting for this one as the other.

The backing for Plane Quilt was a light, almost sky, blue with purple-ish diamonds.  Like the other quilt, the backing was also part of the binding.  I had never tried this type of quilt binding before, and I've never liked that method since learning to hand-stitch binding.  While I had machine-bound my first two quilts, I had not done so by using the backing.  The instructions also specifically asked for machine binding, so I complied.

To make the binding, the quilt sandwich (the top, batting, and backing) was pinned as usual, leaving about two inches of the backing free.  Once quilted, I trimmed the batting with scissors (I would normally use my rotary cutter) in order to not cut the backing.  Then I went in with my rotary cutter and trimmed the backing to a one-inch trim.  At that point, I folded the backing edge almost to the batting/quilt-top edge, then folded again and pinned it down like there was no tomorrow.  I guess I could have ironed it, but at this point, I was ready to be finished!

Once pinned, I fed the quilt though my machine, being carefully to take out pins before they hit the needle.  I've heard many, many ladies say that they have broken needles by hitting pins, and I just don't want to have to deal with that...LOL!

Now, I can't say this is my favorite way to bind a quilt, because I am still partial to the hand-stitching method.  However, this did give me the opportunity to use some decorative stitches that came on my machine.  Claire had brought one of her quilts in and showed me that she used a button-stitch, so that is where I got the idea.  For the bugs, I used what looked like a fancy cross-stitch pattern and for the planes, I used a diagonal stitch.  It was really pretty!   I also used a variegated thread on the plane quilt.  I happened to have it in my thread box and the colors matched perfectly.  I think it really added some character.

I also ended up with a few good scraps for my stash.  When I make my first scrappy quilt, these will be part of it.  A fun story to tell people when they see it.  

The quilts have been sent off now, so the next step is for me to log on to their website and register.  Once I do that, the recipient can also log on and look for my quilt.  Of course, this part is totally optional, but I think I will do it.  It will be nice to see where these quilts end up.  :)