6.29.2011

packages

I love packages. Some I order and anxiously await, some come full of wonderful surprises. Both are fabulous.

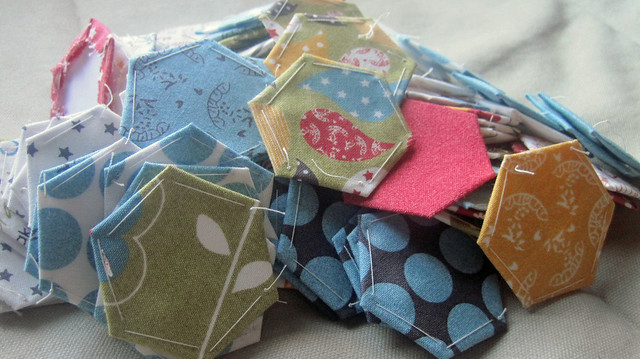
Before I left for vacation last week, I received two such packages.  One was a packet of 4-inch squares as part of Crafty Tammie's Swap a Rainbow that I participated in.  I forget how many people were involved - 20, maybe? - but we each sent a pack of 20 4-inch squares in each of 10 colors.  200 squares.  I sent mine from my current stash-on-hand and this is what I got back...

IMG_2915


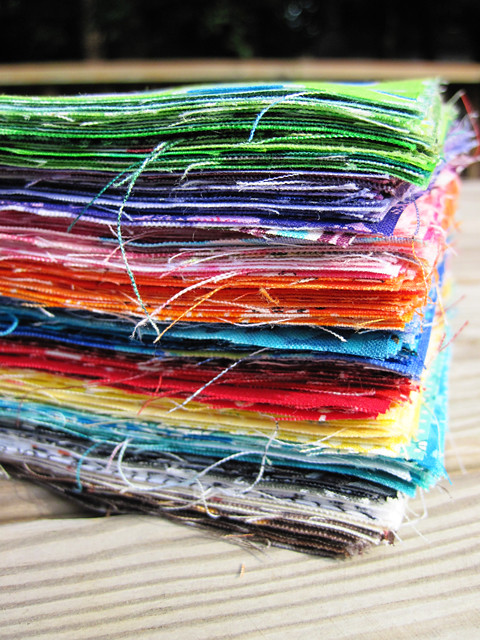
Plus a few extra charms from Tammie and a wonderful key-chain she made.  Here's a closer look a the squares.

The colors were yellow, blue, purple, orange...

squares1


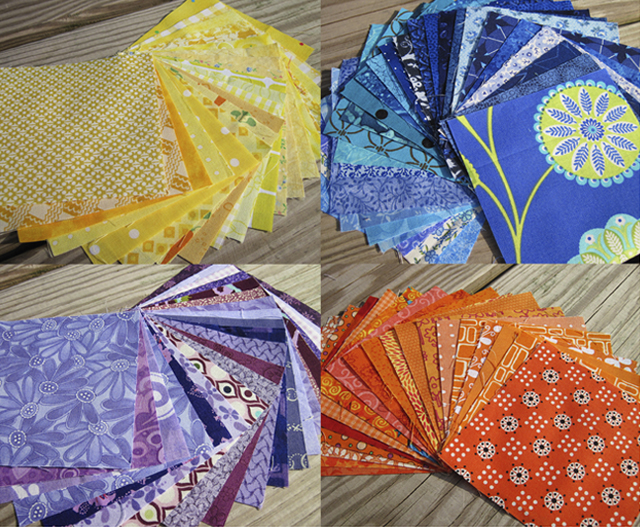
...brown, black, green, teal...

squares2


... red and pink.


squares3


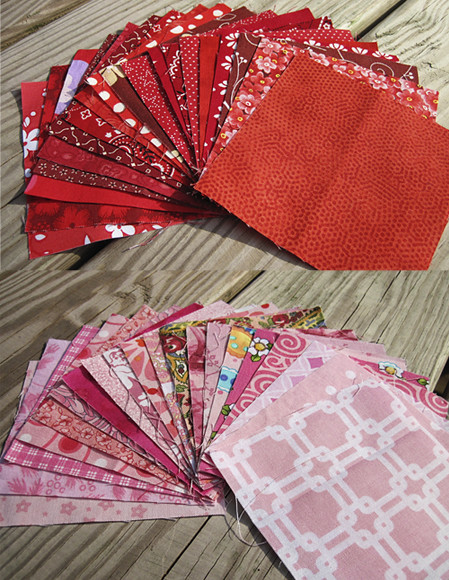
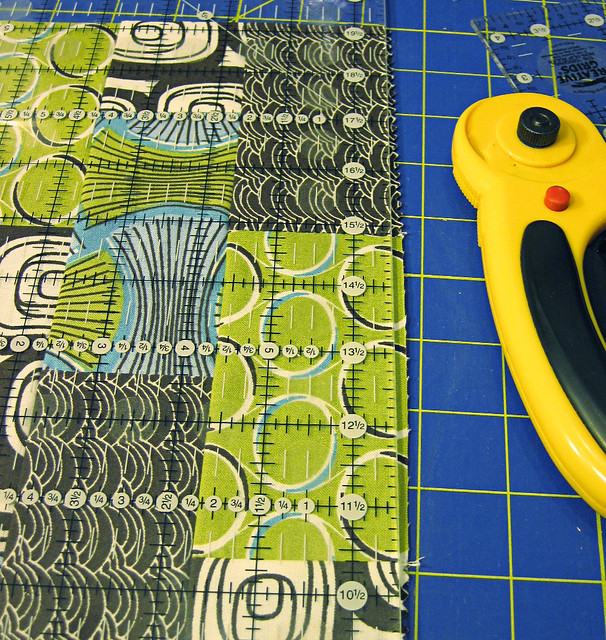
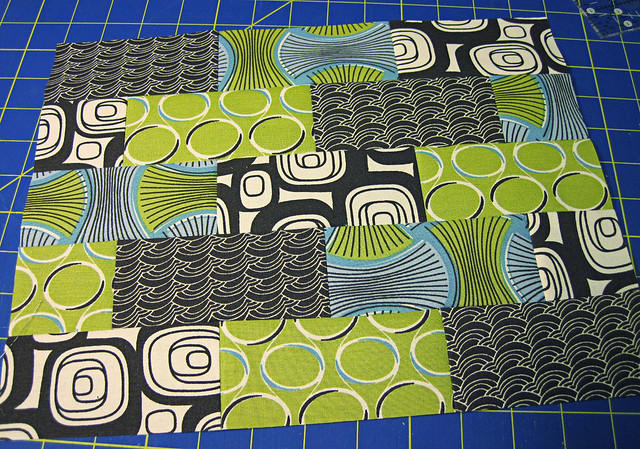
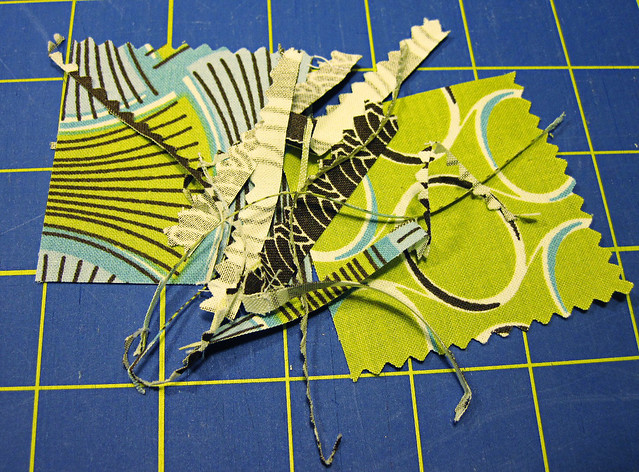
I've got a couple of ideas brewing for these...mostly involving half-square triangles.  I'm really happy with the fabrics that I received - high quality and a lot of fun.  I'm still new at this swap stuff, so sometimes I get a little nervous that I'll receive rejects.  Not so with this swap.  Of all the fabrics - over 200, remember - there was only two that were repeats.  Not bad, not bad!

Now, my other package was expected, but exciting none-the-less.

IMG_2917_edited-1


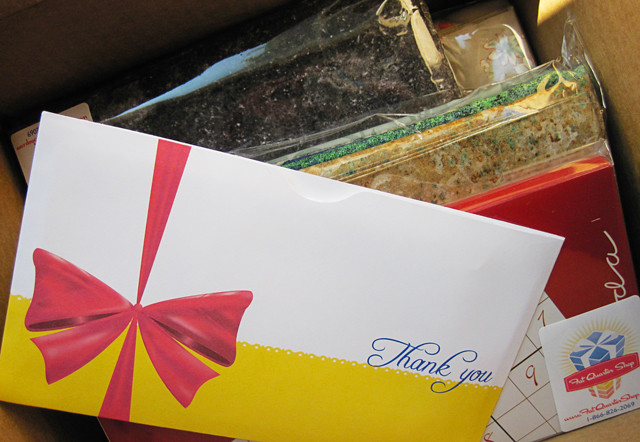
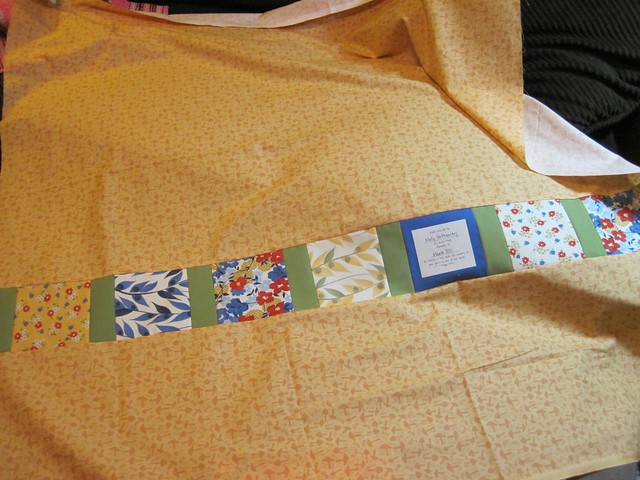
The package was from Fat Quarter Shop, and represents two quilts I'll be working on soon. The first is for my friend Jen, and is my first commissioned quilt. She is an excellent photographer and asked me for a quilt to use in her photo shoots. I had her pick out a few favorite collections, and she chose Oasis as her top pick, along with several other Moda collections. I chose the beige for the quilt back and the teal (or is it aqua...what's the difference?!) for the binding.

IMG_2924_edited-1


The remainder of the package is a collection of Stonehenge fabrics that I toiled over for days.  They had several pre-chosen collections, but none seemed to fit the bill for me.  Plus, I needed a yard of each color, so precuts wouldn't work.  I wanted blues and greens but with an earthy feel to them, so I added the grays for a granite look.


IMG_2925_edited-1


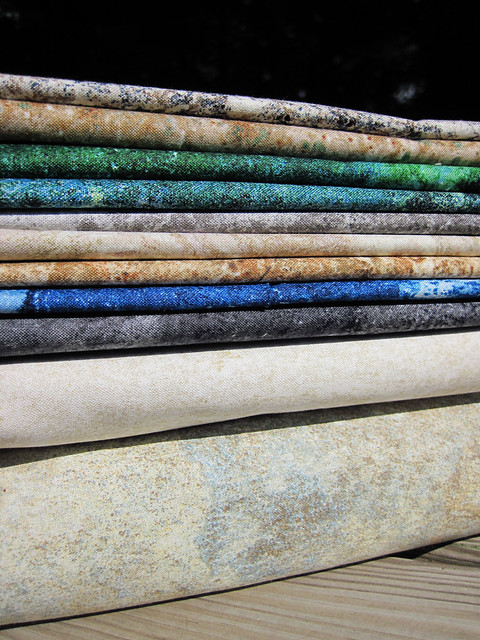
The tan/beige (next to bottom) is the background and the green/beige on the bottom is the back.  The remainder of the colors will be the diamonds in a Star of Bethlehem quilt.


The pattern is by Edyta Sitar and my church group is working on it through the summer.  I am behind already (there's a surprise!) because I forgot about the prep work and didn't have my fabrics in time for the first class.  I'll start working on cutting the fabric immediately after I get home and try desperately to catch up.

Once finished, the quilt will be 78-inches square - the biggest I have ever made.  It will be for my father-in-law.  He's the one who made my quilt table for my sewing room as well as doing countless other things around the house for us - including coming to my rescue at 5 AM one Saturday to free a possum from my dog lot.  If anyone deserves a quilt, he does.  But...shhhhhh!... it's a surprise.  (And right now, I'm glad he doesn't have internet!!).  :)

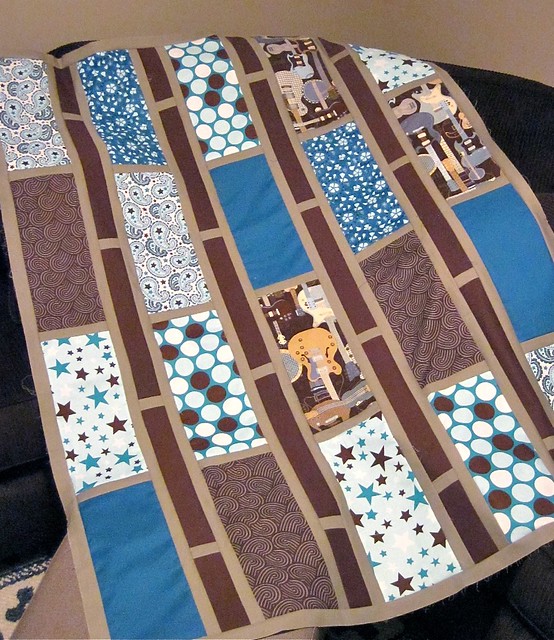
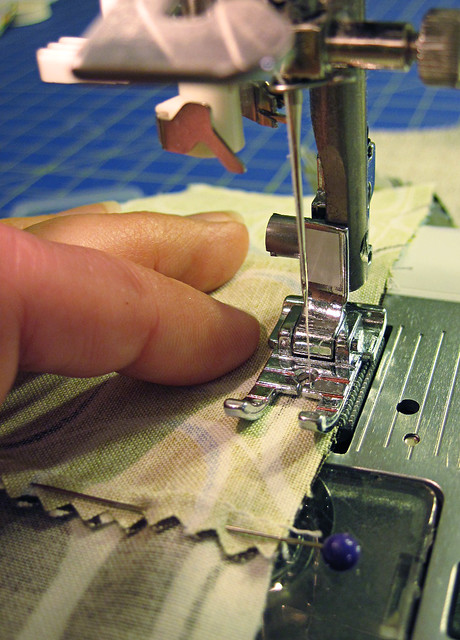
As far as current projects, I'm sewing the binding on Molly's quilt and Matt's Coffee quilt.  I'm missing my sewing machine terribly, but making do.  Today was an inside day with a lot of storms and rain.  Otherwise,  we're just not inside much - the rest of the week looks much better.   The guys and a couple of the kids went fishing, but only caught one Spanish Mackerel each.  Not a good fishing day.  Since we were stuck inside, I worked on the binding, made a few more hexagons and did some computer work.  I'm nearly halfway around Molly's and hope to be done by Saturday.  I also started on a new blog/group that I'm starting up - more info on that in another post...but if you are paying attention, you'll see a new button in my sidebar.  :)

Hope you're all having a great week!

WIP Wednesday at Freshly Pieced


Photobucket

6.24.2011

time for a vacay

Well, I'm sad to say I didn't get my Guitar Quilt quilted on Wednesday. When I got to the local quilt store, all jazzed and excited, I found out they were closing at five. Not enough time to get the quilt done. Turns out their normal closing time is five, but they stay open later for classes on days they have classes. When I booked the appointment, there was a class scheduled until seven that night but no one signed up for the class, so it was cancelled. Therefore, the shop closed at five.

The ladies were super nice and tried to help me out, even offering for me to get started and leave it on the machine overnight. But with work being what it is and my evenings being booked solid, that just wasn't an option. So, I'm signed up for July 14th now. There is a class that day, too, but it's the middle of a Beginning Sewing series that already has people in it, so I should be ok. :)

So - instead of finishing that quilt at the beach, which was the plan, I'll now be finishing Molly's quilt (the Above All Fabric quilt along) and Matt's Coffee Quilt.  I was able to piece the back of Molly's Quilt and get it quilted on Saturday.  Here is the back...no pic of the quilting yet.

IMG_2931


Both are already packed in the car, ready to go. We'll be gone for two weeks, which should be plenty of time to get the binding done.  I'm also taking my pile of hexies.  I've been working on these since last fall but Kristen at K*D Quilts has inspired me to get to work on them again.  I have about 150...but need about 1,100.

IMG_1959.jpg

Tonight will be a fun night...girls night out to the Def Leppard concert in Raleigh.  Can't wait.  Then a day with the boys tomorrow, likely including Cars 2, and off to the Outer Banks with everyone Sunday.  This is our ninth trip together and we look forward to it all year long.  And I mean that quite literally - we start talking and yearning for "next year" the day that we leave.


If you've never been to the Outer Banks, you need to add it to your list of things to see.  We are partial to the southern part, Hatteras Island in particular.  You just can't beat it.  Tiny villages full of houses, vast beaches, and gorgeous sunsets.  Wanna see?  Here's a google images search on "Outer Banks NC".   No traffic, no noise, no hoardes of people.  Sheer, wonderful, all-out peace.  Island life is the life for me.

It takes forever to get there...nearly six hours from our friends house...but it's worth it.  Because the islands are so far from the mainland, there are only two places to cross - Manteo/Nags Head has a set of bridges or you can take the Swan Quarter ferry to Ocracoke and another to Hatteras.   We opt for the former as Ash gets seasick and the SQ ferry is about two hours long.  In some areas on Hwy 12, you can see water on both sides, the island is so thin.  Very cool...except in hurricanes.   


So in a little over 48 hours I'll be unpacking and settling into what has now become our home away from home.  I'm still trying to convince Matt that we need to retire there.  Almost there.  :)

Can't promise a lot of activity here, but I'll try.  I'm sure you'll understand, though, if I make myself scarce.  After all, someone has to watch the kids while they play.  :)


Photobucket

6.22.2011

WIP Wednesday - so excited!

I feel like a dork, but I must say, I am on cloud nine today.

I have an appointment at 3:30 with the long-arm machine at my local quilt shop...and I feel like a 17 year-old getting ready for a big date. The day simply can't go by fast enough.

I'm quilting the guitar quilt for my youngest. This one...

IMG_1778

I have to say it's one of my favorite quilts to date.  I love how the browns and blues have come together and the fabric is sooooo characteristic of my son - it fits him perfectly.

The back ended up being a bit of a pain for me, but I finally got it done.  You may remember my post about planning and piecing, where I featured this little pic.  

IMG_1778


Well - in trying to create that back, I learned that there *is* such a thing as too complex.  I spent more time trying to figure out and piece the back than I did piecing the front, including my screw up.  Not good.  

So, I scrapped my plans and started all over.  One simple strip down the back, just to the right of center, with a label in the middle, inspired by Julie's pieced back tutorial.  I used the guitar fabric for the back, with a vertical stripe of the tan and the chocolate around my label.  (Sorry, no pic yet).

It's hanging in my car as I type, ready to go straight from work to the quilt shop.  I have to constantly keep myself from going out and checking on it...you know, to make sure it's safe.  :)

Once done, I'll attach the binding and pack it up for my beach trip.  Will be hand stitching it there since my sewing machine has been banned by hubby.  (Can't say that I blame him - he knows I'd never stop sewing!)

Quilting pics tomorrow!

WIP Wednesday at Freshly Pieced


Photobucket

6.20.2011

landscaping update

So here I sit in the land of sickening irony... and governing it all is my friend Murphy.

I had this fabulous post all planned out, showing you my landscaping progress.  How I went from this...

IMG_2328_edited-3.JPG

to this..


IMG_2842_edited-1.JPG


I was going to show you my before pictures....

IMG_2329_edited-1.JPG


And talk about all the in-between pictures...

IMG_2332_edited-1.JPG


IMG_2330_edited-1.JPG


IMG_2351_edited-1.JPG


But then THIS happened.... 

IMG_2935

Some storms came through North Carolina on Saturday...not big ones, really.  We've had much worse.  A "watch" popped up on my weather radio and I checked the radar.  A wall was moving towards us, but no warnings.  We were going about our business.  No thunder, no lightning.  Then "BAM!!".   So loud that my husband ran in and shouted, "I'm OK, I'm OK!!" because he knew I'd be freaked out.  He had been outside watching the trees and had to duck for cover.

Twenty minutes later, the warnings came out - for counties to the east.   At least they had warning.

The limb hit the corner of our roof and slid down the side of the house - knocking things off my son's wall, while he was in the room.  (Yeah - this mamma's still a little freaked about that one.)

IMG_2933

IMG_2940

The damage to the house appears fairly minimal, which we are very thankful for.  One of our neighbors had a chainsaw out yesterday cleaning up a limb in his yard.  Lots of old trees in this neighborhood.  Fortunately, his was only in the yard and did not his his house.

Of course, we're also super thankful that Matt and Trenton made it inside (they were both outside) and Tanner wasn't hurt given the tree just missed his bedroom window. (I was in the basement sewing, of course....LOL!)

My plants on the other hand, didn't fare as well.  This is what it looked like after Matt moved the limb.

IMG_2941


I had planted three peonies.  One came out unscathed.  This one was hit, but probably will make it.  Just the outer stems snapped.

IMG_2944


This little guy, though... not much hope.  All stems were snapped right at the base.  I left it planted; maybe the roots will shoot up new stems. 

IMG_2943


Not really sure how the two below will turn out.  It's upsetting, too, because they were the ones showing the most growth.  I've cut the broken stems off now, and they are about half their original size.   *sigh*

IMG_2942


Again, though, it could have been much worse, so I'm just frustrated more than upset.    We try to make our yards look better, but nature comes and knocks us back.  All four of us got out and cleaned up things yesterday (I have the best family EVER!) and it looks good again.  All the stray sticks and leaves are now in the burn pile.  :)

So, here's to some healthy rains and warm sun - maybe my plants will make a comeback afterall. And here's to a safe, in-the-basement, sewing room, where I can hang out and pretend that storms don't exist.  :)


Photobucket

6.17.2011

Brick block tutorial - featuring Daisy Janie

A while back, Jan at Daisy Janie Organic Fabrics posted an idea for a Project Linus quilt.  In a nutshell, she was looking for quilters to help by making blocks for a quilt.  She would send out charm squares to anyone interested, we would make the block, send it back, and she would assemble the quilt.  I've been wanting to try her fabrics for a while, and I love the idea behind Project Linus, so I jumped right in.

The instructions were simple... make a block.

No specific pattern, no size limitations, etc.  Just make a block using the fabric she sent.  I played around a bit in my mind and ended up with this:


IMG_2885_edited-1.JPG


And here's a tutorial for it!

One small note... this is a rectangular block.  Finished size is approximately 10.5" x 14.5".  However, if you wanted to make it a square, it would be easy enough to alter.  I wanted to use as much of the material as possible, thus the rectangle shape.

To start, choose eight 5" (charm) squares.

IMG_2864.jpg

Featured here are (left to right) Hip Squares, Crystal Ball, Caravan, and Bundles from Daisy Janie's Geo Grand collection.

Cut each square in half to make a total of sixteen 2.5" x 5" strips.

IMG_2865.JPG

Once cut, lay out your strips in such a way that they look like bricks stacked on top of each other. I chose to lay mine out in a stairstep fashion, alternating the green and blue with the browns.

IMG_2869.JPG

As you can see, some strips will hang off the sides. For one of them, you will need to cut a strip in half to fill in the hole on the second row (see below).  I cut the brown (bottom right) to fill in the hole (top left) so that the pattern continued.

IMG_2869_edited-2.JPG

For the other danglers, you have two options on cutting.

Option 1: cut them into 2.5" squares like so...

IMG_2872.JPG

...and attach them when sewing.

Option 2: leave them as-is and attach, trimming at the end.

I chose both - I chose to cut the Bundles (green/blue) strip and leave Crystal Ball (green circles) strip so you could see each.

Now, using that infamous scant 1/4-inch seam, sew your strips together to create five rows.

IMG_2873.JPG

You should end up with something like this (remember, the green is the dangler I left in):

IMG_2874.JPG

Don't panic if the rows aren't the exact same length. Some have more seams than others, which cuts down on the row length. For instance, in the photo above, you can see that the fourth row down is shorter than the row above and below it. That's OK.

Now, because the rows are uneven, we aren't going to line them up at the edges to sew them together. Instead, center the rows by folding the top one in the center, finger-pressing (no iron needed), and matching the crease to the seam below it in the second row.

Clear as mud?  OK step by step...

Take Row 1 (at the top) and fold it in half.

IMG_2876.JPG

Finger press to make a slight crease.

IMG_2875.JPG

Pin to Row 2 (right sides together) so that the middle seam of Row 2 matches up with the crease you just created in Row 1.

IMG_2877.JPG

IMG_2878.JPG

Sew Rows 1 and 2 together, using a scant 1/4" seam.

IMG_2880.JPG

Continue the same process by finding the center and sewing each row together, folding to create a crease and matching it to the center seam in the adjacent row.

Once you have all rows sewn, trim your block, cutting only the minimum necessary to make a straight edge on all sides.

IMG_2881.JPG

When you're all done, your block should look like this:

IMG_2882.JPG

...and your leftover scrap pile like this:
IMG_2884_edited-1.jpg

I know, not much for building a stash, but pretty awesome for trying to use all your fabric!!


Now, if you were wanting to make a square you could either adjust the original layout (before sewing) and cut more strips into squares to fill holes. Alternatively, you could trim to a 10.5" square in the final step and have more for your scrap bin. Either way would work just fine.

I hope you enjoy this block! Be sure to keep an eye on the Daisy Janie blog for pictures of the quilt. I can't wait to see how it turns out.

Oh, and if you make a block using this tutorial, please add it to the Stitching by Starlight flickr group.  I'd love to see it!!


{Sew} Modern Monday at Canoe Ridge Creations
UndertheTableandDreaming


Photobucket