Showing posts with label finished projects. Show all posts

11.12.2014

a quilt for hubby

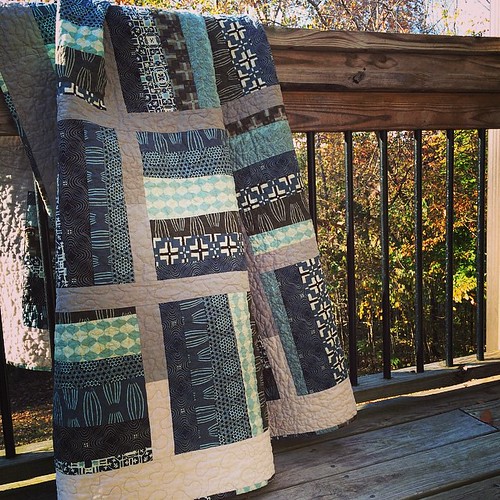
My first quilt finish of 2014 (yes, I know it's November...) was actually a long time in the making. But for a very special man.

hubbys quilt

A couple years ago in blog-land, a buzz went around about making quilts for our beds.  The idea was that we all had tons of beautiful quilts, but nothing for our beds.  I was immediately inspired, so I went on the hunt.  We were ready for a change and the newly released Parson Gray Curious Nature was the perfect line.  I bought Tula Pink's Cherry Pie pattern, chose my fabrics (focusing on the browns and blues) and off I went.

I fully intended to make the large version of the quilt, which calls for 17-inch blocks.  I started sewing and cutting and...wouldn't you know it, I ran out of fabric.  I had mis-measured or mis-trimmed or something and, quite frankly, it stalled me out.  I didn't want to undo the strips as they are wonky-cut, so I knew getting them back together would be an issue.  I also didn't want to just go buy more fabric, because then all my blocks would have the same fabric on the edges...I wanted to keep the random look.  So, they sat...and sat...and sat.

Fast forward about two years.

I come across the blocks, still unfinished, while setting up my new sewing room.  Still frustrated, and not sure what to do, they hang for another few months.  Then, suddenly, it dawns on me...duh!...cut them down.  Then, an even better idea - make a quilt for hubby, and give it to him for Christmas.

One of my first quilts, my Coffee Quilt, was for him.  I bought the fabric at a quilt show with no plan and almost no experience.  I only had enough for a 48x48 quilt.  Um... hubby is 5'11".  The running joke in our house is how the first quilt I made him is only good for covering his legs.  :)

So, one weekend while he was away with friends, I pulled out the blocks and started measuring.  (I'd also managed to lose the pattern.) Yep...12.5" blocks would work!  I dug out my partially-sewn background strips, played around on my design wall, and then waited.
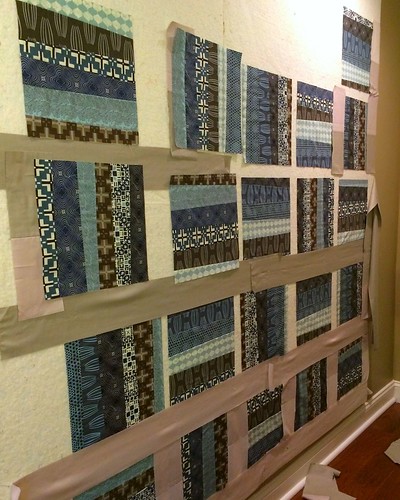
Untitled

He was getting ready to leave the country for ten days, so that gave me the perfect chance to work on it without him seeing me. Within a few days of his departure, the top was done.  One seam down the back, and it was done. Then came the hard part...the quilting.

My friend Kelly...an FMQ goddess...taught me to free-motion on my home machine, but I was scared to death.  I've quilted my own quilts before, but always on the long-arm at the local shop, and usually with a good bit of frustration (and even tears!).  I had all these grand schemes in mind...different quilts for different blocks...but then decided to just stick with a simple meander.  Two days and three bobbins later, I was done!
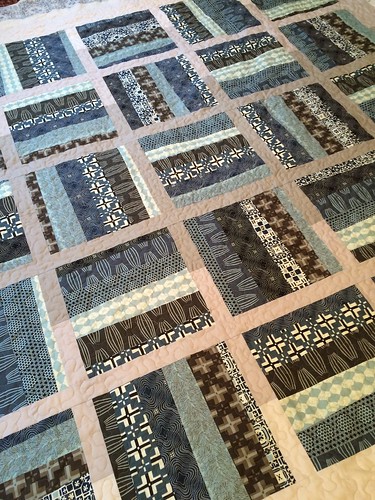

I made a scrappy binding, got it attached and finished turning it the day before he got home.
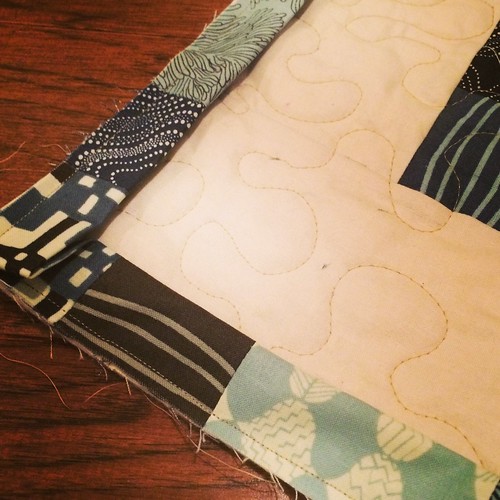


Washed and dried into crinkly yumminess.  Perfect timing.
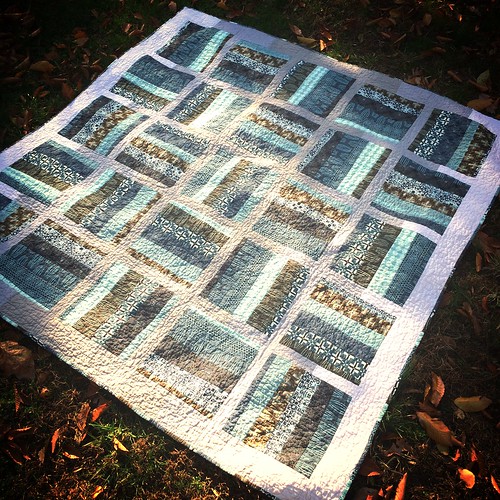
Untitled

When hubby got home, I couldn't stand it.  Maybe because I was so excited at my accomplishment.  My first finished quilt in over two years, and my first free-motioned quilt on my own machine (incidentally, the machine that he bought me).  I was so excited, I just had to show him!  So...I caved.
Couldn't help it.

...He loved it.  :)

hubbys quilt


~*~*~*~*~*~*~*~
Quilt Stats

Pattern: Cherry Pie by Tula Pink; modified
Size: approx. 78" x 78" 
Quilt Top Fabric: Parson Gray Curious Nature and Westminster Solids
Backing: Parson Gray Curious Nature, "Sand"
Binding: Quilt top scraps
Pieced and Quilted by: Angie Kimel (Viking Sapphire 830)

~*~*~*~*~*~*~*~

6.23.2012

Box-Bottom Tote Tutorial

Summer is upon us and around here, that means one thing... BEACH!!

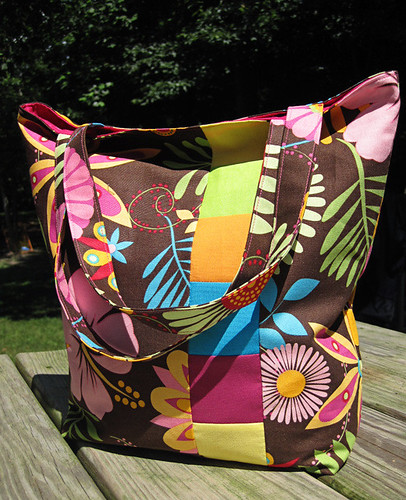
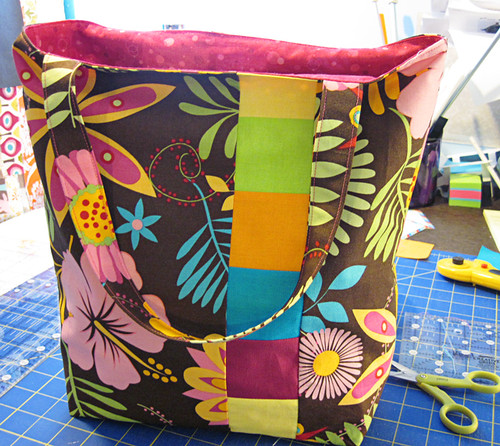
Each year, we start summer with a beach trip to Hatteras, NC with some friends.  Feeling the need for a quick project I decided to use up some tropical scraps I had laying around for a quick little beach bag.


tropical tote - final


Now, please note...I'm not one to lug everything but the kitchen sink down to the water.  I pack light, so my bag is light.  A book, some sunscreen,  bottle of water and maybe a small snack are all that go with me and my beach chair.  However, if you like to take more than that with you, this tote is still perfect for those little things that get lost (or covered in sand!) in those humongous beach bags.

The whole thing took about 3 hours - and that's with me stopping to take notes and pictures!  I'm sure your bag will go faster than that.   Enjoy!

Box-Bottom Tote Tutorial

Fabric:

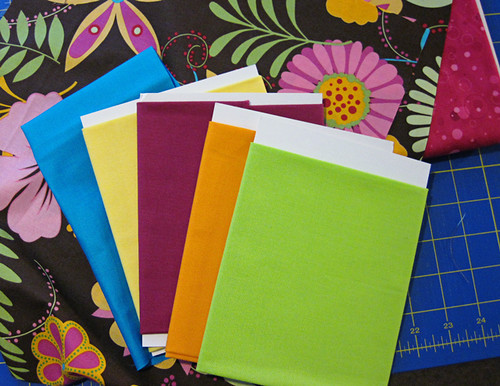
To start, you'll need to choose an outer fabric, an interior fabric, and fabrics for your accent stripe.  You could probably use scraps for this project, depending on how big your scraps are.

NOTE:  Sewing is right sides together with 1/4-inch seams unless otherwise noted.

tropical box bottom tote 1


From the outer fabric:  Cut two 4.5 x 14.5 inch pieces, and two 8 x 14.5 inch pieces for the outer shell.  Cut two 4 x 18.5 inch pieces for the straps.

For the accent stripe, cut fourteen 2.5 x 2.5 inch squares.

From the interior fabric, cut two 14 x 14.5 inch pieces for the main interior and two 4.5 x 6.5 inch pieces for the slip pocket.

Directions:

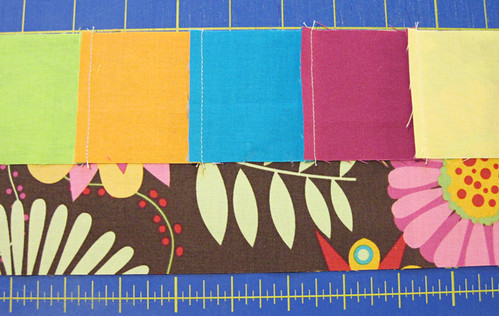
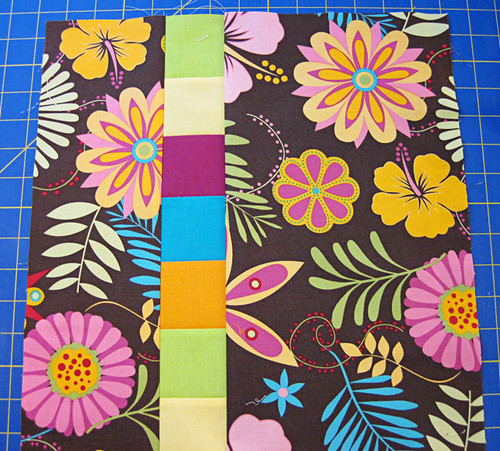
Sew seven of your 2.5 inch squares together to form a strip 2.5 inches wide by (approximately) 15 inches long.  Repeat with the remaining seven squares so you have two strips.

Line up the long side of one of your strips with the long side of one of the 4.5 x 14.5 piece of outer fabric, right sides together.  Sew together and press seams to the outer fabric.


tropical box bottom tote 2


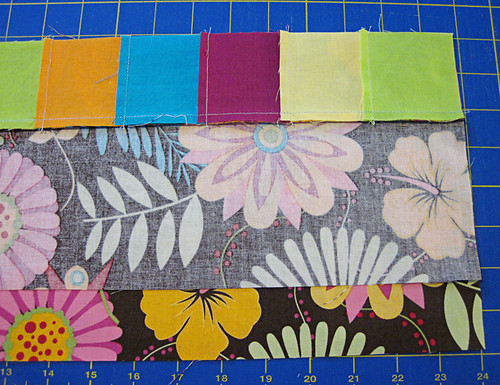
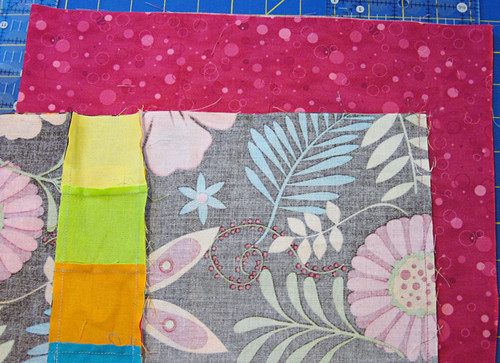
On the other side of the squares strip, line up one of the 8 x 14.5 inch piece of outer fabric and sew, right sides together.  Press toward outer fabric.


tropical box bottom tote 3


 You should now have a piece that looks like this:

tropical box bottom tote 4


Repeat with the second set, sewing the squares strip to the outer fabric pieces in the same way.  Trim to 14 inches across and 14.5 inches long.

Place your two outer panels right sides together.  You can chose to have the stripes meet or not.  I wanted my bag to look the same on both sides, so my stripes did not meet (see below).

tropical box bottom tote 5


Sew around the side, bottom and side edges of these pieces.  Do not sew across the top - leave it open.

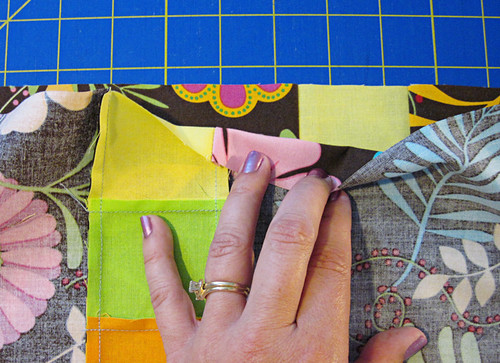
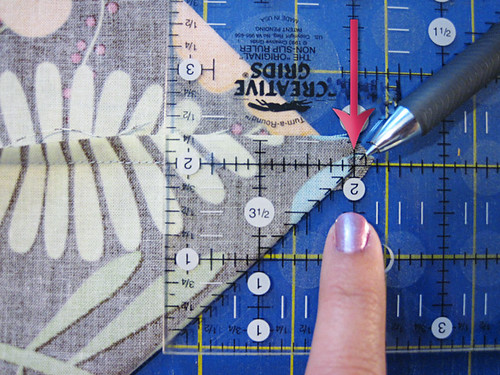
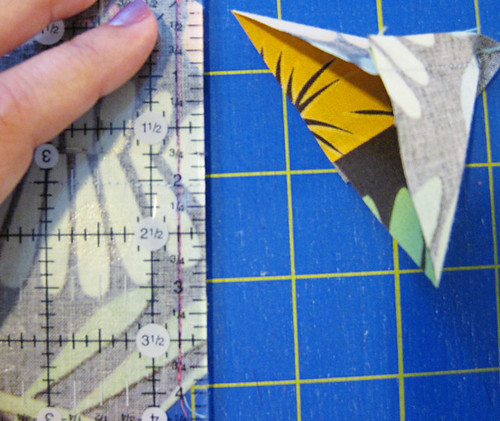
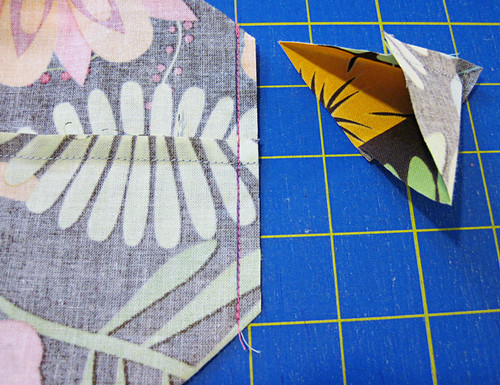
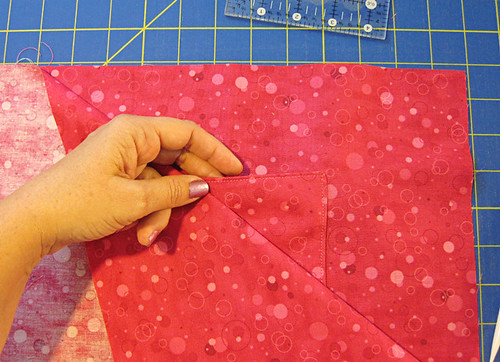
To box the bottoms, pull your fabric apart and fold the bottom so that the seam is on top and the fabric forms a triangle.  Measure the tip of this triangle at two inches, using the 45-degree angle on your ruler as a guide.  With a fabric marker, mark the line on the left side of the ruler.  Sew on that line.


tropical box bottom tote 6


Once sewn, line up your ruler so that the 1/4-inch mark is on the line.  Trim.  This gives you a 1/4-inch seam.

tropical box bottom tote 7


Repeat for the other bottom corner of the bag.

tropical box bottom tote 8


Now, let's move to the pocket.  With right sides together, sew around all four edges of the fabric, leaving about two inches to turn. 

tropical box bottom tote 9


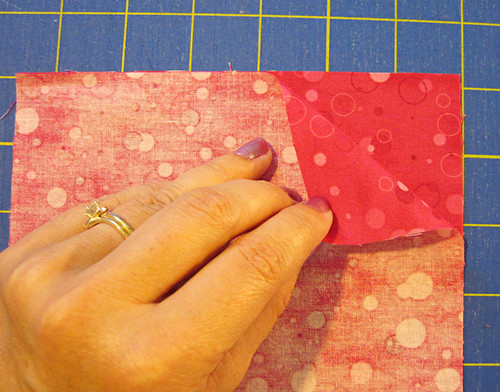
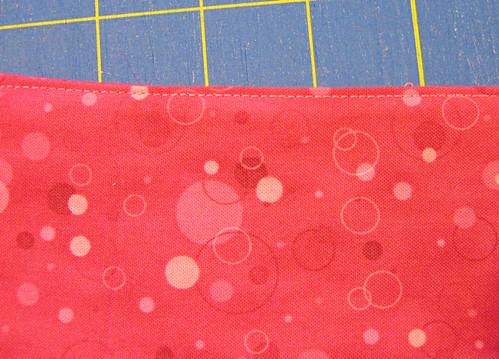
Turn the fabric right-side-out and press flat.  Tuck in your open edges at the top (the hole you turned the fabric through), press them inside and pin.  Topstitch across the top of the pocket.  It should be about 1/8-inch from the edge and it will close up that open spot.

The top edge should look like this:

tropical box bottom tote 10


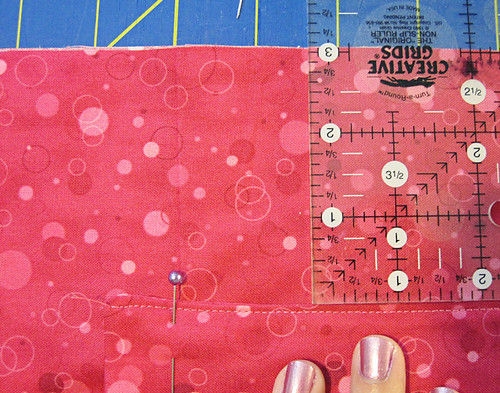
Taking one of your interior pieces, pin your newly created pocket about 3-inches from the top edge of the interior piece.  Sew around the sides and bottom of the pocket, backstitching at the top on both sides for a little added strength.  (Leave the top open, or it will be a patch and not a pocket...LOL!)

tropical box bottom tote 11


 Now, to finish the interior, take your other large piece (14 x 14.5) and place it on the interior piece with the pocket sewn on.  Make sure your pocket is face up.

tropical box bottom tote 12


Just like the outer fabrics, sew the interior panels together on the sides and bottoms only.  Leave the top open.  Box the corners using the same method that we used for the outer fabrics... measuring two inches out and cutting a 1/4-inch seam.

When finished boxing the corners, turn your interior panel right side out (leave the outer fabrics wrong side out.)

tropical box bottom tote 13


Now, let's make the straps.

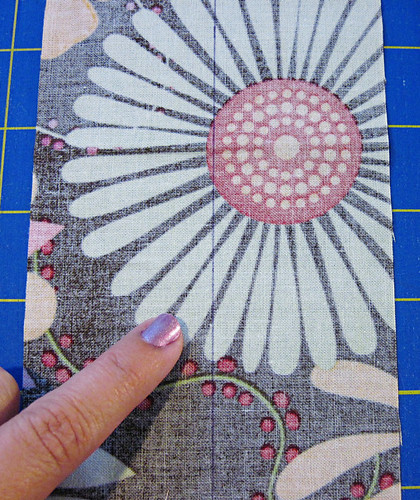
 Mark the lengthwise center of each of your 4 x 18.5 pieces with a fabric marker. 

tropical box bottom tote 14


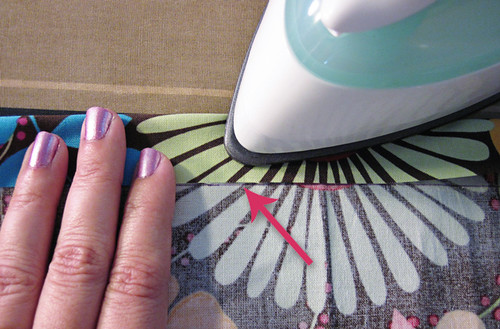
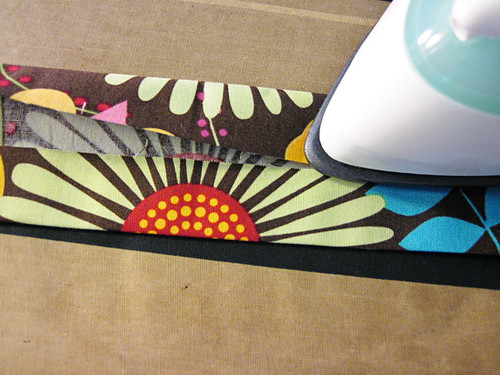
Press each edge in to the mark you just made.

tropical box bottom tote 15


tropical box bottom tote 16


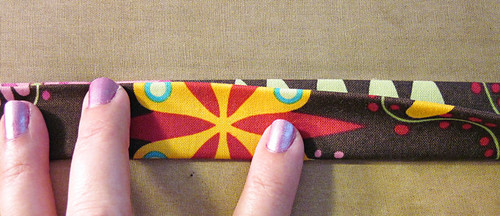
Then, keeping the edges in the center, fold the folded edges together and press. 

tropical box bottom tote 17


Pin together, then sew a 1/8-inch seam to close.  Then topstitch another 1/8th seam on the other side to match.  Repeat the same process to make a strap out of the second 4 x 18.5 inch piece.

Your finished straps should look like this:

tropical box bottom tote 18


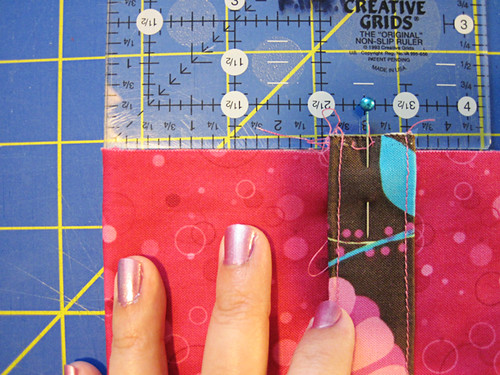
To attach the straps, pin them so that the outer edge of the strap is about 2.5 inches from the edge of the interior piece.  Pin it so that the raw edge of the strap is a little over the top edge of the interior fabric, not lined up perfectly.

tropical box bottom tote 19


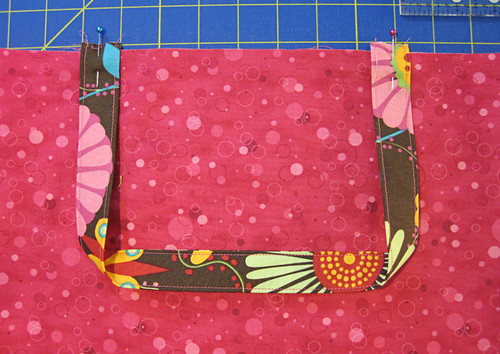
Pin the other end of the strap about 2.5 inches from the opposite side.  To ensure your strap doesn't twist, make sure it forms a "U" shape as shown below. 

tropical box bottom tote 20


Repeat with the other strap, pinning to the other side of the interior panel.  Be sure you are only pinning each strap to one part of the interior - don't pin your interior together in the process.

Now comes the fun part!

Tuck your interior piece - still right side out, with straps pinned in place - into the wrong-side-out outer shell piece.  Line up your boxed corners as best you can, but don't worry too much about them.  Focus on getting your side seams lined up.  Pin in place.

tropical box bottom tote 21


With the interior and exterior facing (with straps in between), sew around the entire top with a 1/4 inch seam, leaving a 3 or 4 inch opening to turn.  I also like to backstitch on each side of each strap, for a little more strength in that spot.

Once finished, turn the bag, pulling the interior and exterior fabrics through the hole you left open.  This part can get a little frustrating - take your time and go slow.  :)

tropical box bottom tote 22


Once you have the bag turned right side out, tuck the interior into the exterior, matching up your boxed corners.  Press your seams for a crisp finish, tucking in the seams at the opening that you turned the bag through.

Top-stitch a 1/8-inch seam - just like we did for the pocket - to close your opening and give your bag that nice, finished look.  Now, tuck in a good book, some water and sunscreen, and head out to the ocean or pool!

tropical box bottom tote 23


Enjoy your summer!!

Photobucket

Linking up:
BWS tips buttonFresh Poppy Design

6.15.2012

Charmed by the Sea

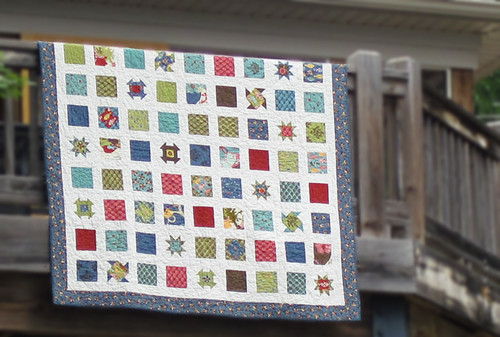
Late last year, AnneMarie at GenX Quilters hosted a wonderful Quilt Along called Charmed Prints. Finally...in April...I finished mine. Only four months late. *cough*

Charmed by the Sea 2


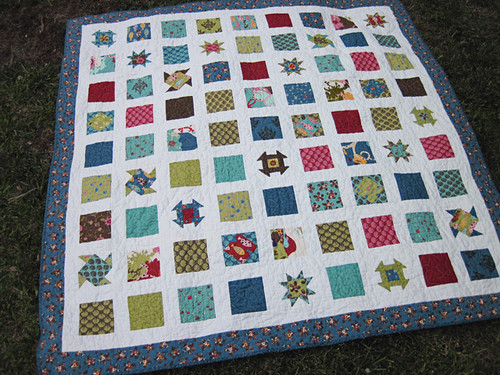
The QAL was focused on using a charm pack to make a simple quilt with sashing and borders.  I needed something simple, and I had a three quarters of a leftover layer cake of Odyssea.  (For those of you who don't know, one layer cake is the equivalent of four charm packs.)  Seeing a good way to use some stash, I jumped in.  There were four blocks featured, of which I chose three - the Star Block,  Diamond in the Square, and Pinwheel Block.  The remainder of my blocks are just the charms themselves, no additional cutting.  Easy peasy.

My boys had been bugging me for another quilt, and I wanted one that my family could share.  The Odyssea fabric was perfect as we are a family of beach bums, living for our annual Hatteras beach trip with friends.  So, I decided to call this one "Charmed by the Sea". 

charmed prints


It's my largest quilt to date - measuring 70-inches square - which makes it big enough to share and it's found a fabulous home on my living room couch.

Charmed by the Sea 3

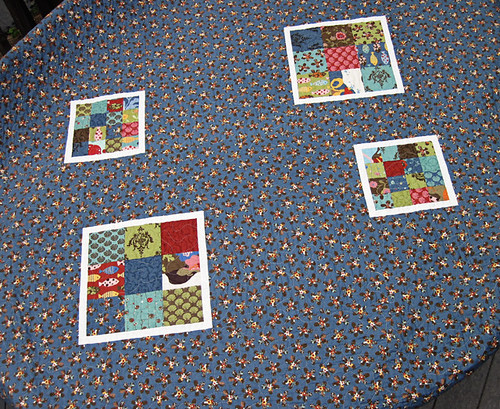
With school going on and life being what it was, I had a hard time keeping up.  The top came together in late December and I pieced the back, making 9- and 16-patches out of my scraps and leftover charms.  My oldest son even helped with the block placement, which was fun.  :)

Charmed by the Sea 1


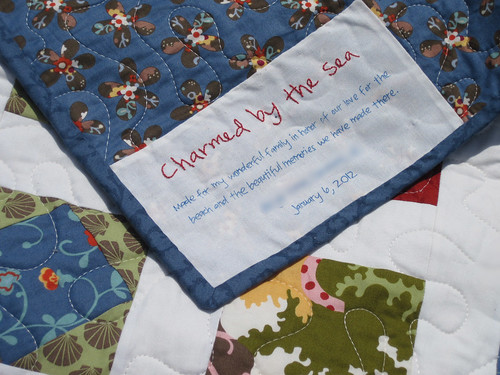
I quilted it in January - a simple meander on the LQS long-arm - and made the label, but then got stuck for some reason.  I hand-stitched the binding up until I had about 15 inches left and then stopped.  I don't know why. There it sat, in my living room, until April.  I finally picked it up to take with me on a beach trip with friends.  I finished it that night and took it out on the beach the next morning...without my camera.  *sheesh*.

Charmed by the Sea 4


So, despite the fact that it is a beach quilt, made for the beach, inspired by the beach, and in honor of the beach....I have no pictures on the beach.

Maybe next week...when we head to the beach.  :)

~*~*~*~*~*~*~*~
Quilt Stats

Pattern: Charmed Prints Quilt Along by AnneMarie at GenX Quilters
Size: approx. 70" x 70" 
Quilt Top Fabric: Odyssea Layer Cake by MoMo for Moda and Kona White
Backing: Athena in Ocean Blue (from Odyssea line)
Binding: Ionia in Ocean Blue (from Odyssea line)
Pieced and Quilted by: Angie Kimel

~*~*~*~*~*~*~*~
Linking up:
Making Monday Marvelous Linky PartyThe Southern InstituteFresh Poppy Design

6.05.2012

Tangled Webs

A few weeks ago, I learned the mixed-emotioned news that Karen Gray was closing her store and, in her place, The Little General Fabric Boutique would be opening. I loved Karen's store and had full plans of teaching there later this fall, but was very excited to hear the news about the new store.

In true Karen style, she had set up a fabulous celebration for the Little General's opening, inviting none other than the fabulous Tula Pink to come speak about fabric design and autograph books. Tula will be here tomorrow - and in the store, waiting for her, is my new quilt...Tangled Webs.

TW-rail1

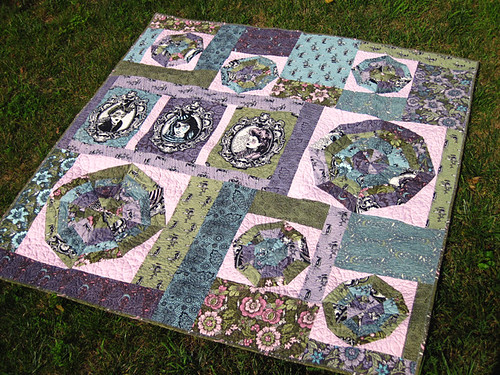
As soon as Karen announced that Tula was coming, I offered to make a Nightshade quilt.  With the line being Halloween-inspired, my immediate thought was a spiderweb quilt.  So with fabric in hand, I immediately started paper-piecing webs.  I even took off a day of work to make the top...and ended up with about 4 webs.  Four.  Out of 36.  Hmmm.

TW-side
So while complaining to a friend over lunch, I tried to figure out a way to incorporate the webs into a quicker design.  Having been inspired by the panels in Quilt Dad's quilt the week before, I started drawing on scratch paper and quickly had a mock up of a top that incorporated two different sized webs into large blocks of fabric.  I used the webs I had already finished, made a couple more and, bam... here it is.

TW-lawn

The back is pieced as well, with a small strip highlighting two of the sisters and a web...mostly because I made one too many webs.  *cough* 

TW-back

My friend Gina quilted the quilt and did a fabulous job.  I gave her free reign over the quilt design and the finished piece came back with gorgeous webs, swirls, and cross-hatching.  It's so beautiful!  She had just recently decided to go into the quilting business, so if you're looking for a wonderful quilter, I highly recommend her.

TW-web

In all the flurry and chaos, this quilt has opened several opportunities for me.  Remember my plans for teaching at Karen's?  I'll be teaching at The Little G in the fall, instead... teaching this quilt!  Classes will start in August, so if you're local and interested, let me know.  Gina has also talked about putting together kits for the top, too, so watch for that as well.

TW-sisters

For those not local, but still interested in the quilt, I'm in process of finishing up the pattern.  That's right... I'll soon have a pattern out!  This will be the first pattern I've ever offered, so I'm very excited and I'm trying to get things done just right.  I had hoped to have it ready by today, but no go.  I had no idea how time consuming quilt patterns could be.  And your reward for reading this far?  I need pattern testers! 

Even though the pattern was designed with Nightshade in mind, I think it lends itself to many different fabrics, especially Halloween ones.  If you are interested in pattern testing, leave a comment or shoot me an e-mail.   You should be comfortable with paper-piecing, and able to manage a quick-turnaround of no more than two weeks for a pieced top.  **Edited to add: Thanks for all the pattern testing offers! I have my testers and will be in touch soon.**


I hope you like the quilt!  I'll be back in a couple days to highlight Tula's visit.  I'm looking forward to meeting her and hanging out.  Should be lots of fun!

Photobucket